Creating watercolors with Photoshop is fast, easy and fun!
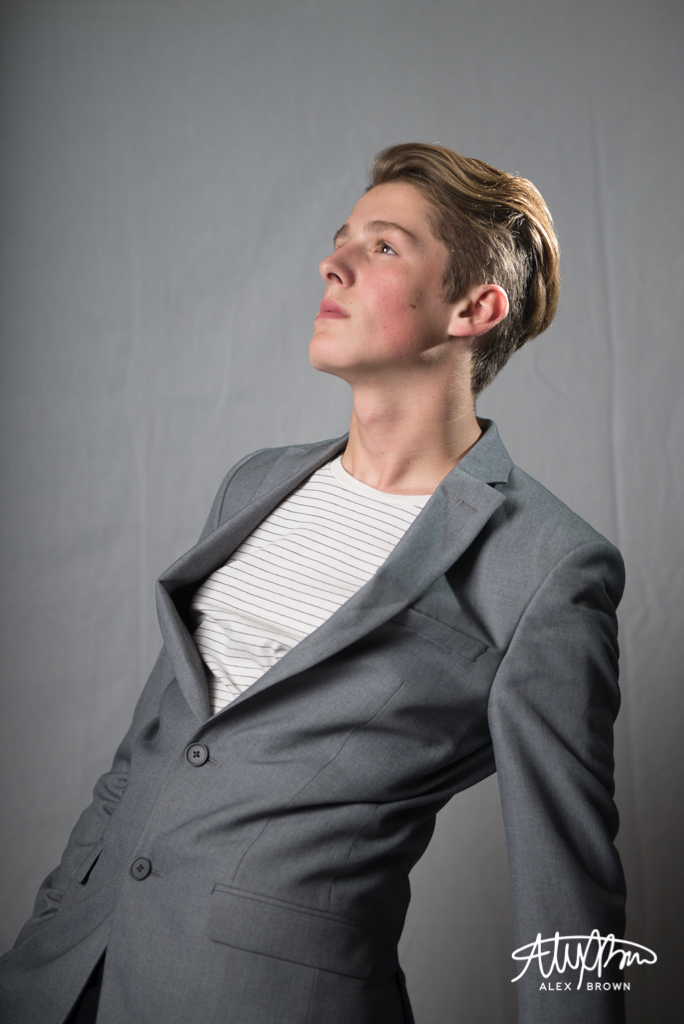
I had a lot of fun creating this watercolor piece in photoshop. I took this picture of Boston, a 15 year old model here in Rexburg, a few months ago at a shoot. When shooting this picture, I wanted to keep it simple. I love his facial expression and how he’s looking off to the left, but also his swagger in his stagger!
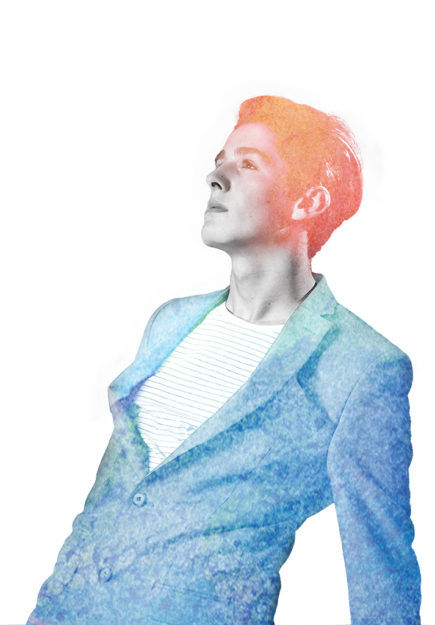
Creating watercolors in photoshop is way easier than I thought it would be. I started by following this tutorial, but eventually dropped off and started exploring on my own!
So you don’t have to watch the video, I’ll do a quick run through of what I did:
- Select and Mask the original photo so it would be against a white background
- Placed the image in a new document
- Desaturated the image 100%
- Added the Watercolor effect from the effect gallery
- Placed the blue watercolor image over my image with the screen blending mode
- Masked out with a brush the blue to only be on his suit
- Placed my orange and pink watercolor image on top with the lighten blending mode
- Masked out with a brush the orange to only be on his hair and then adjusted the opacity to slowly graduate off his face
I chose orange and blue since they are complementary colors and they looked awesome together! When placing the blue watercolor, I included more of the bright aqua tones at the top of his jacket because it was a much more vibrant contrast with the reds, oranges and pinks of the other watercolor in his hair!
Here is the original image of Boston that I used for this watercolor. I used the watercolor textures on a project a few years back so I can’t link to the original download anymore, but heres the file that I still do have and what I used!