My favorite shots during totality of the total solar eclipse over Rexburg, ID
On August 21, 2017, a rare phenomenon happened from the coast of Oregon to the coast of South Carolina: the total solar eclipse.
Throughout history, light has been seen as symbolic for goodness. However, for a total of two minutes, darkness from the total solar eclipse was seen as a symbol for peace and goodness.
While attending BYU-Idaho, I have enjoyed living in the small college town of Rexburg, Idaho. When word started going around that the center of the total solar eclipse would occur over our town, I knew I had to be in Rexburg for the total solar eclipse. Living in the path of totality meant that the moon would cover 100% of the sun (an eclipse), and that I was going to get some great shots.
With this in mind, I was surprised to find how empty the location I chose to shot at (Webster Flats) compared to all the people who had come to Rexburg. I knew I wanted to shoot the eclipse here because it’s iconic to the area and it’s one of Rexburg’s best kept shooting secrets. Plus, it has some awesome foreground elements and would give me a nice and open landscape.
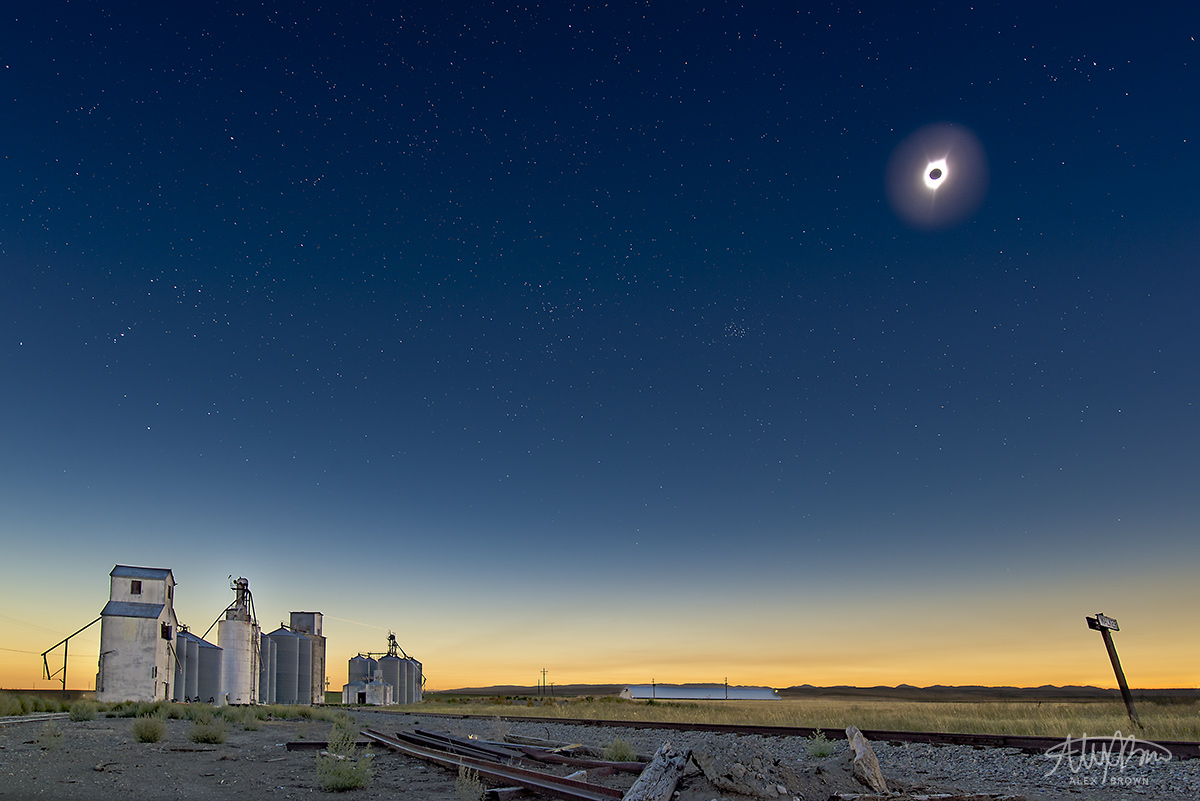
While most were getting their eclipse glasses and solar filters for their telephoto lenses, I wanted to take a complete different approach when shooting the total solar eclipse. Instead of getting an up close shot, I wanted to get a shot that showed the landscape and the environment under the total solar eclipse. Here’s my favorite shot that I got of the total solar eclipse:
When shooting the solar eclipse, I was told I need to wear solar eclipse glasses and have a solar filter (ND filter that is a minimum of 16 stops) for your camera lens to prevent it from melting. During totality,
Both of these are true, but only in certain situations: You only wear solar eclipse glasses to look at the sun when it is not in totality; You only need a solar filter if you have a telephoto lens and plan to photograph the entire stages. During totality, it is safe to photograph the corona without a filter (you are actually supposed to take it off) and you can look at the sun with the naked eye.
During the solar eclipse itself, I was able to hear everyone from Rexburg (about 5-7 miles in town) cheer and hollar. Towards the end of totality, I captured this shot which shows the ground looking almost mars red. The coolest thing is how the sunset gradient remained in the sky while the foreground and the buildings were still spotlighted by the sun… natural light painting!
To see more of my solar eclipse photos and videos of the amazing 360º sunset, check it out on my instagram at http://www.instagram.com/calexbrown. I have posted a video that shows the 360º sunset in addition to a time-lapse that shows the light falling on the building.
For more information on the science behind a total solar eclipse, visit TimeAndDate.com. Also, check out awesome pictures of solar eclipse from National Geographic.
Three cool examples of how special effects can make photography exciting, different and artistic.
Special effects in videos and movies are cool, but I personally like special effects in photography even more! Wherever you are, whatever you have, these three special effects can make your regular photos even better.
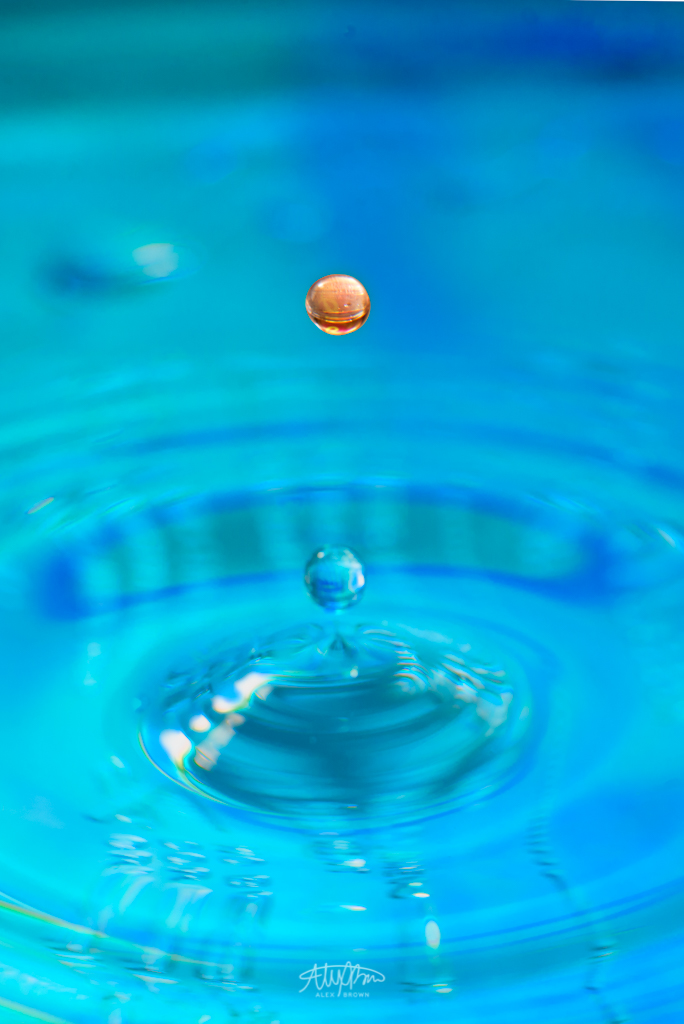
SPLASH
Macro water drops are one of my favorite things to photograph! Last semester, I dropped into the world of macro water drops (no pun intended) and recently, I tried at it again. When taking this macro water drop picture, I used macro tubes on my lens which increases the distance from the sensor to the subject. I actually changed the entire tones of the water to blue, then masked it out to reveal the original orange water drop.
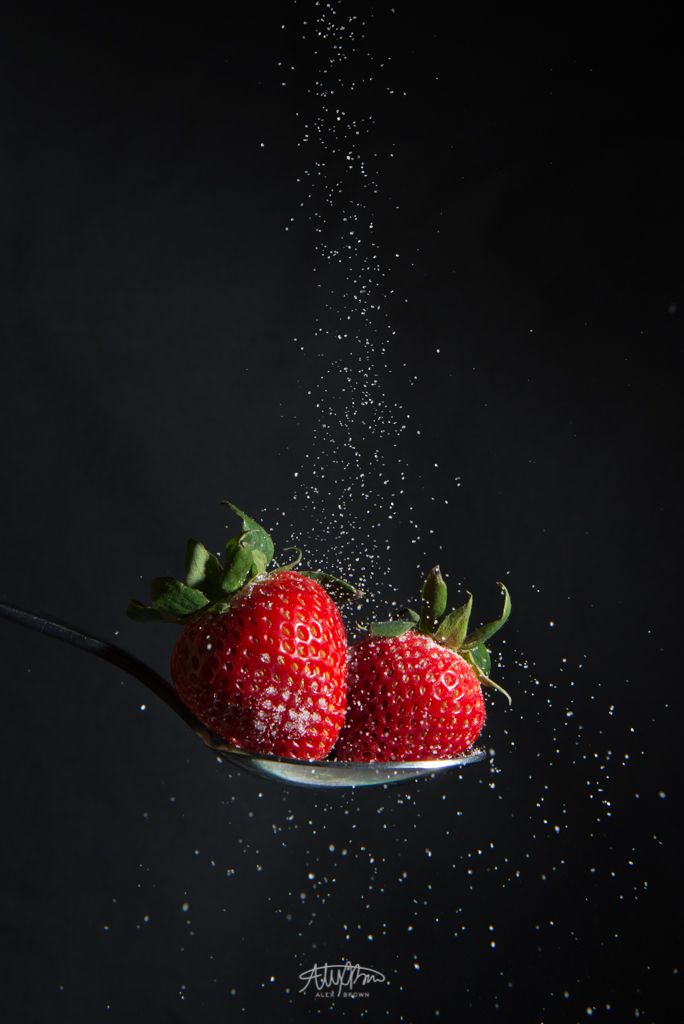
SUGAR
With a super fast shutter speed I was able to catch the small sprinkles of sugar as they fell onto the strawberries. I love how in this picture there isn’t a heavy stream of sugar, yet a shuffle of sugar.
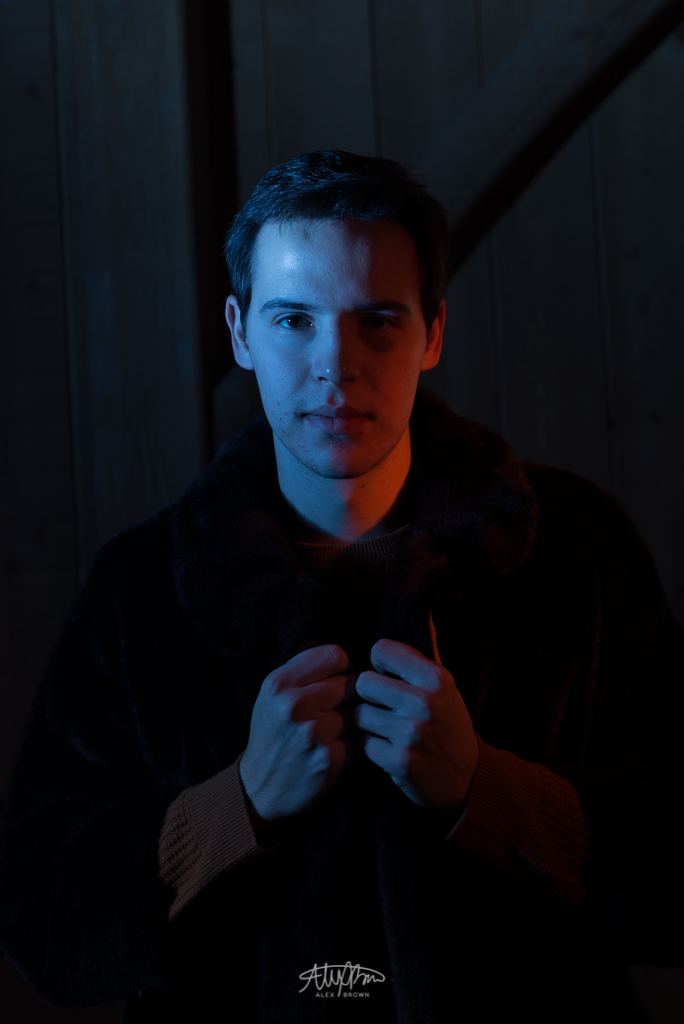
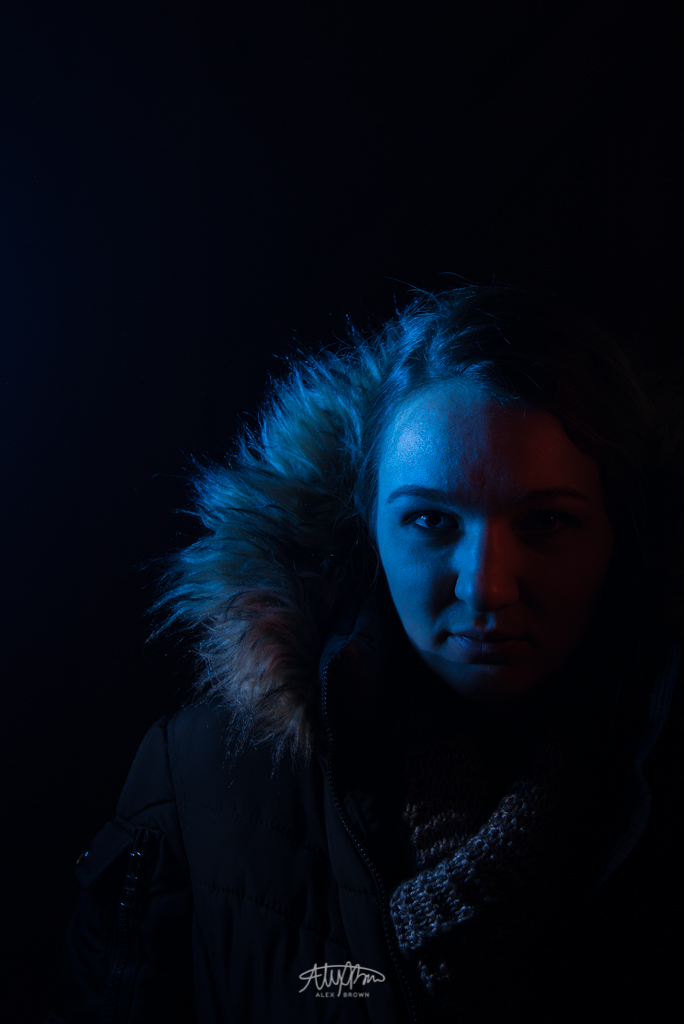
SPEEDLIGHT SATURATION
Using color gels with speedlights are fun and different! I love the first picture of Sam with the split lighting of the red and blue gels. The second picture I love the soft and subtle lighting on Janae’s face and the fur of her parka.
For more cool examples of special effects in photography, check out Megan Graham’s blog post on special effects.
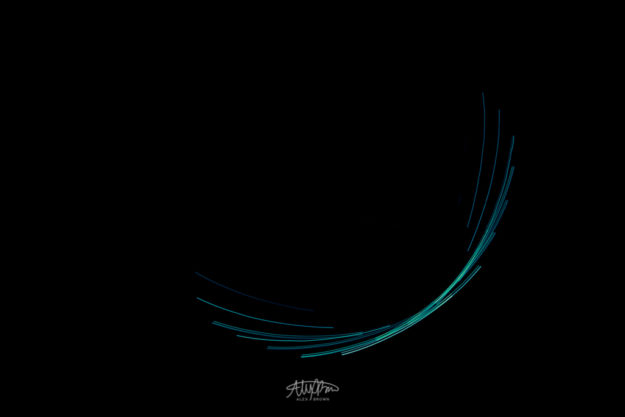
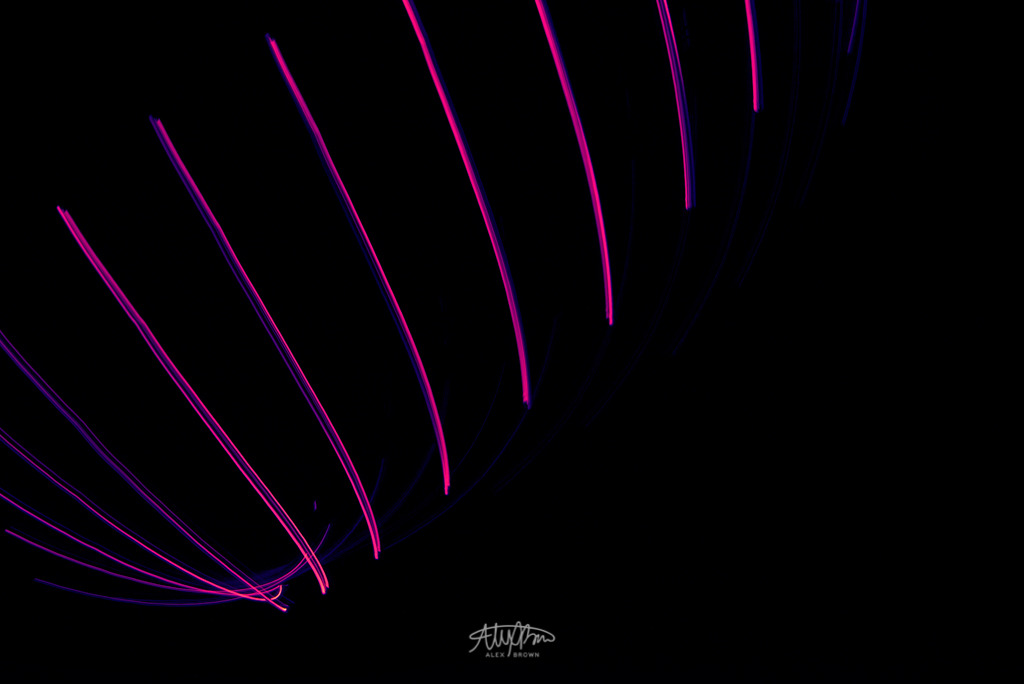
Create awesome photographs at night with light painting
One of the things that I love most about photography is showcasing the delicacy of light. Photography at night is one of the most difficult environments that a photographer can shoot in. With any long exposure photography, a tripod is a must-have.
One of the masters of light painting is Dave Black. As a sports photographer, Dave Black understands the importance of photographing movement. When you combine movement with light and long exposures, Dave Black creates stunning light painting photographs that are beyond jaw-dropping.
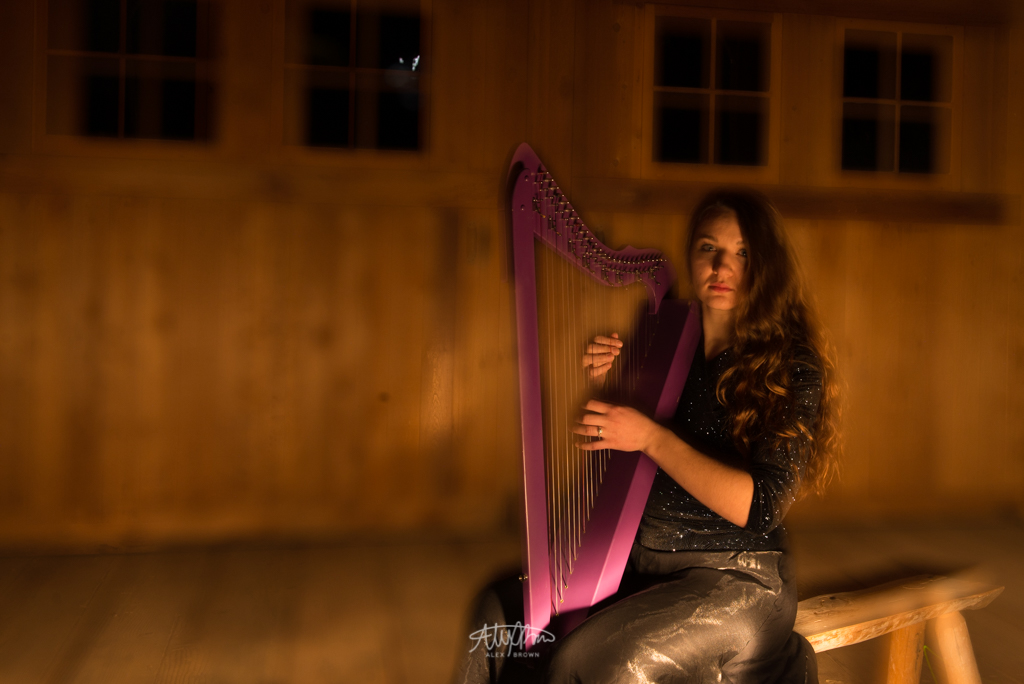
In homage to Dave Black’s light painting style, here’s an image that I took while on a photo excursion workshop in a Victor, Idaho barn. Armed with Yongnuo speedlights, 10 friends and I lined our tripods up inside this barn, turned off the lights, set our delayed shutters, and began walking around light painting the barn.
The reason I chose to show you guys this picture was because I love how it shows what light painting really is. Plus, I must admit Christine Taylor’s pose over to the left is pretty sweet as she flashes the person coming up the stairs with her awesome speedlight. (:
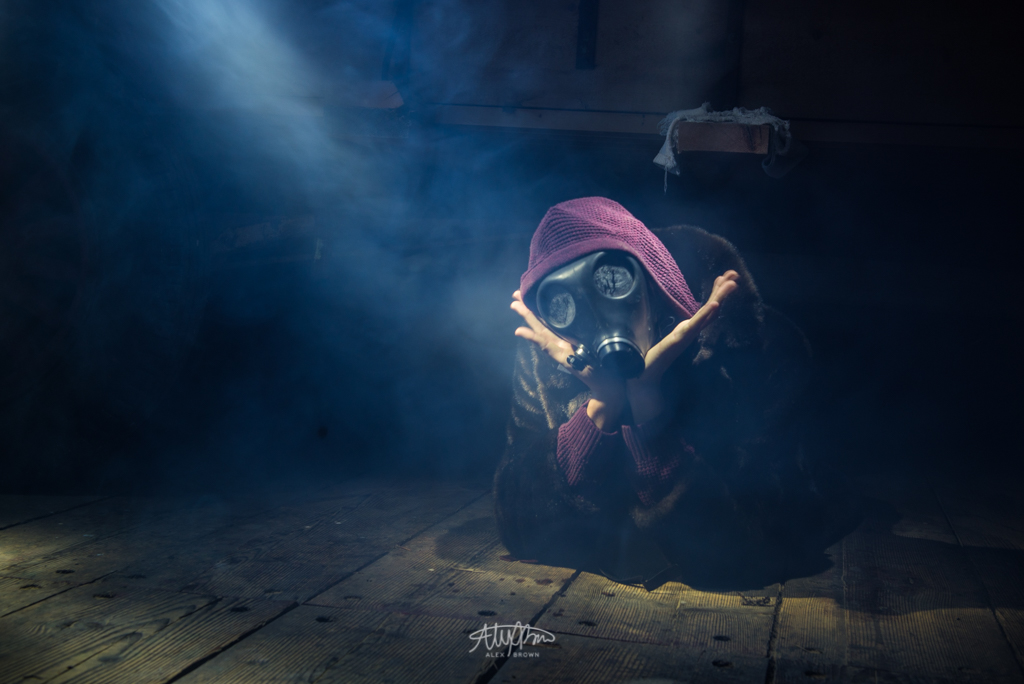
Light painting with people can be tricky, but if you add special effects such as fog and then top it with a creepy mask, you can get away with small movement that just adds to the photo. This was taken underneath that pioneer wagon you can see in the picture above.
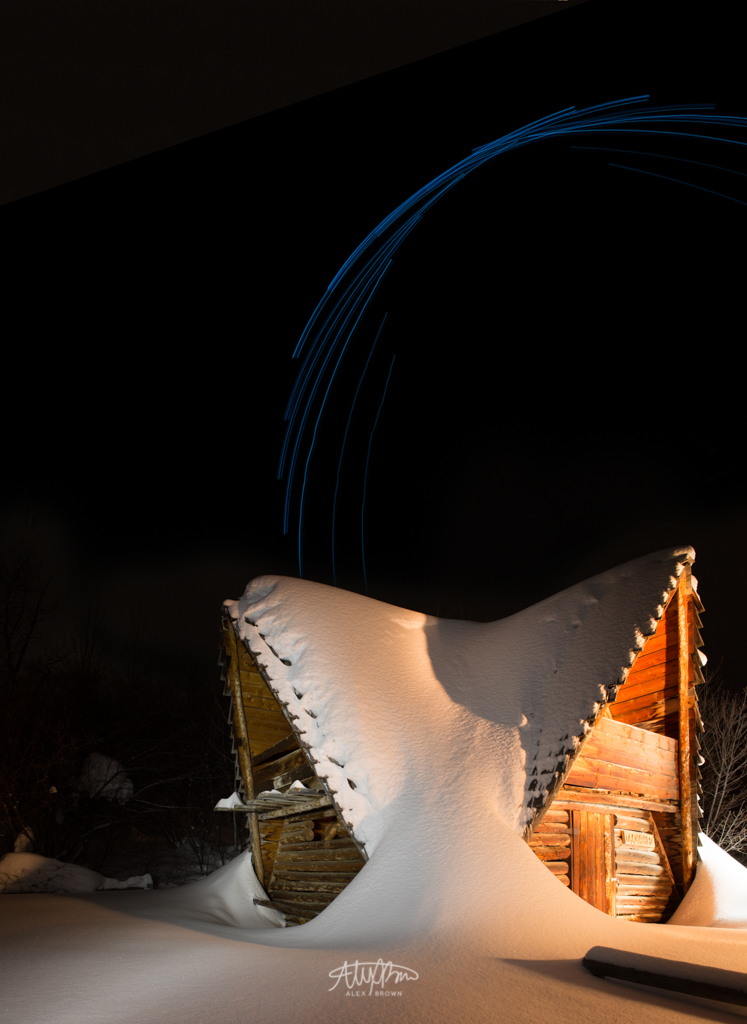
Here’s another light painting of a shed on the same property. On this image, I actually placed an abstract light painting of a light orb that I took and made it look like an isolated set of star trails. Something that I want to point out about this picture is the two different color temperatures of the lights that were used to light paint this shed. The left side was light painted with an LED light while the right side of the shed was light painted with a halogen light. While most light painting is typically done with halogen lights, LED lights work just as well when it comes to light painting.
FAUX BOKEH
Bokeh, or background blur, is probably the most desired aspect when it comes to photography. By modifying the typical light painting technique, you can achieve this “faux bokeh” effect. First, you light paint the subject with your camera in focus. Then, you throw your lens out of focus using the manual focus ring and finish light painting the rest of the image. The hard part with light painting faux bokeh is to not paint over the same section in either round.
ABSTRACT
You guys should know by now how much I love abstract photography. What I love even more is when I can combine abstract photography with light painting. Photographing a light orb is super fun, yet is super challenging because you need to make sure you start your shutter at the right moment so you have a perfect overlapping light orb. Typically when photographing a light orb, you have a shutter speed of around 30 seconds. However, when photographing this light dome, I decided to get down on the ground of the barn and actually speed up my shutter speed. By speeding up my shutter, I was able to get some cool abstract shots which I then moved around in Photoshop and recolored to give a nice variation between these three.
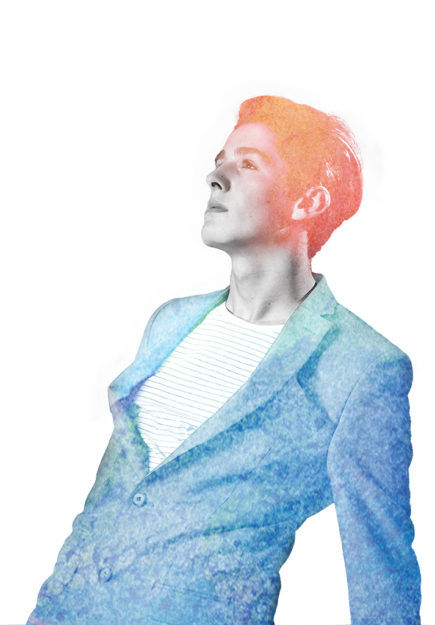
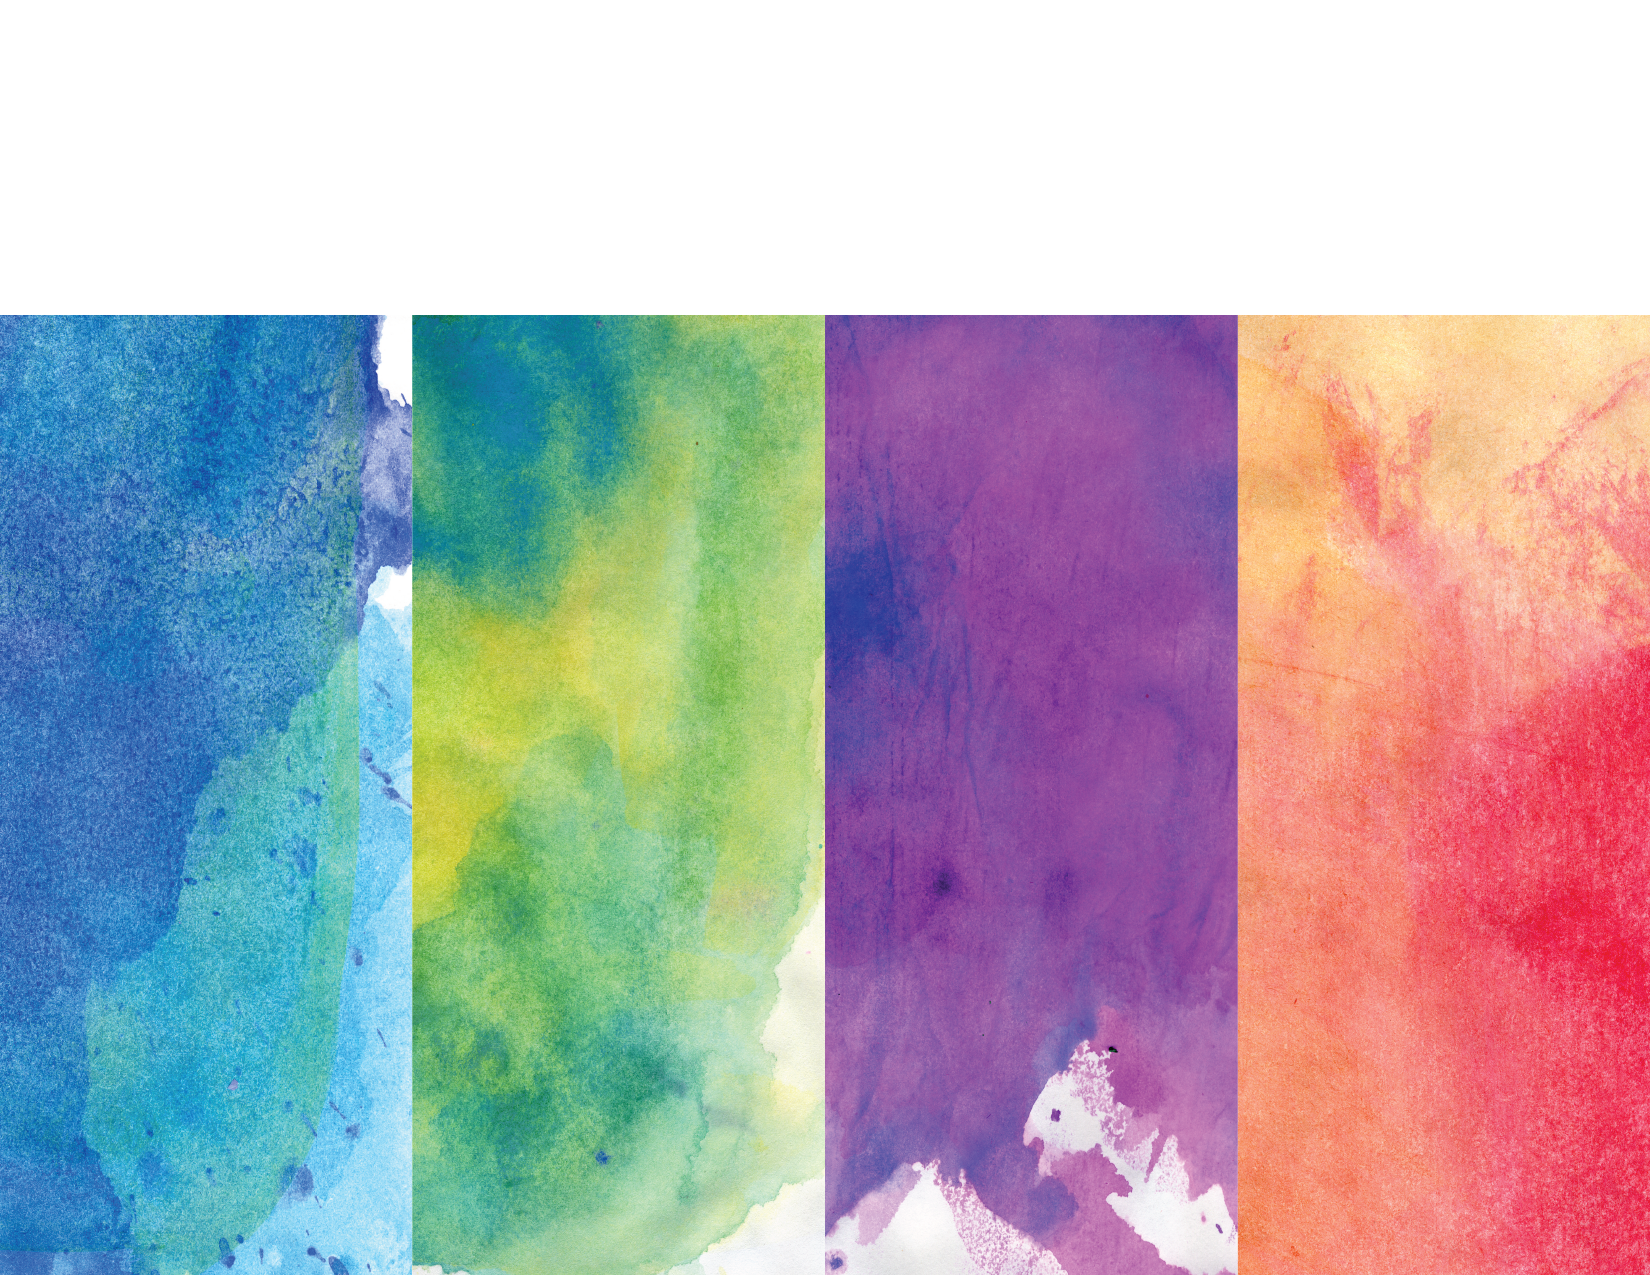
Creating watercolors with Photoshop is fast, easy and fun!
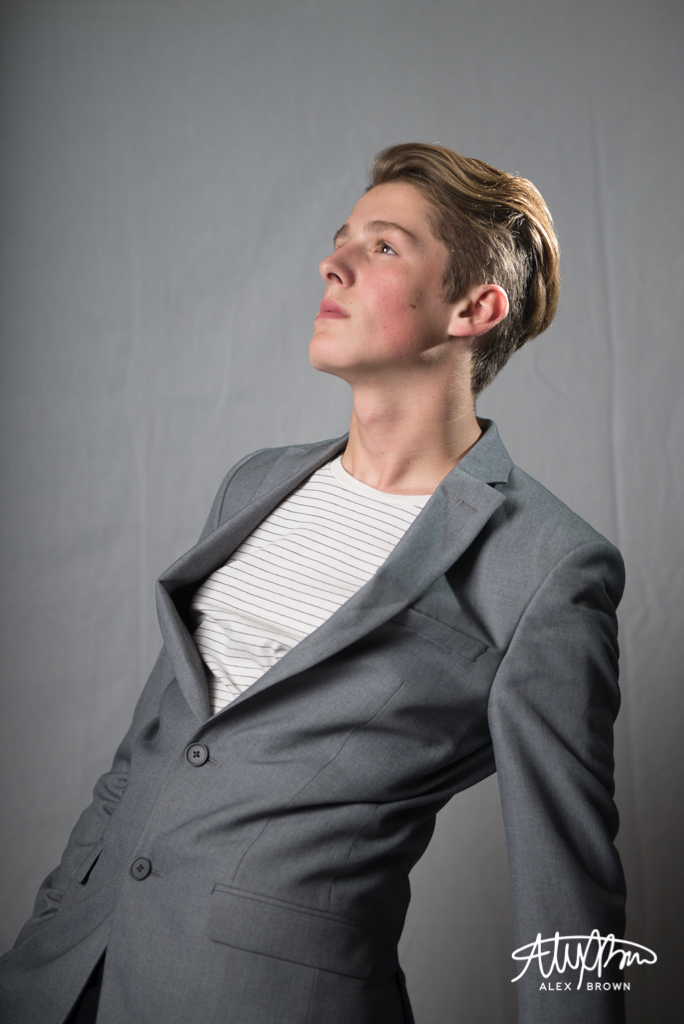
I had a lot of fun creating this watercolor piece in photoshop. I took this picture of Boston, a 15 year old model here in Rexburg, a few months ago at a shoot. When shooting this picture, I wanted to keep it simple. I love his facial expression and how he’s looking off to the left, but also his swagger in his stagger!
Creating watercolors in photoshop is way easier than I thought it would be. I started by following this tutorial, but eventually dropped off and started exploring on my own!
So you don’t have to watch the video, I’ll do a quick run through of what I did:
Select and Mask the original photo so it would be against a white background
Placed the image in a new document
Desaturated the image 100%
Added the Watercolor effect from the effect gallery
Placed the blue watercolor image over my image with the screen blending mode
Masked out with a brush the blue to only be on his suit
Placed my orange and pink watercolor image on top with the lighten blending mode
Masked out with a brush the orange to only be on his hair and then adjusted the opacity to slowly graduate off his face
I chose orange and blue since they are complementary colors and they looked awesome together! When placing the blue watercolor, I included more of the bright aqua tones at the top of his jacket because it was a much more vibrant contrast with the reds, oranges and pinks of the other watercolor in his hair!
Here is the original image of Boston that I used for this watercolor. I used the watercolor textures on a project a few years back so I can’t link to the original download anymore, but heres the file that I still do have and what I used!
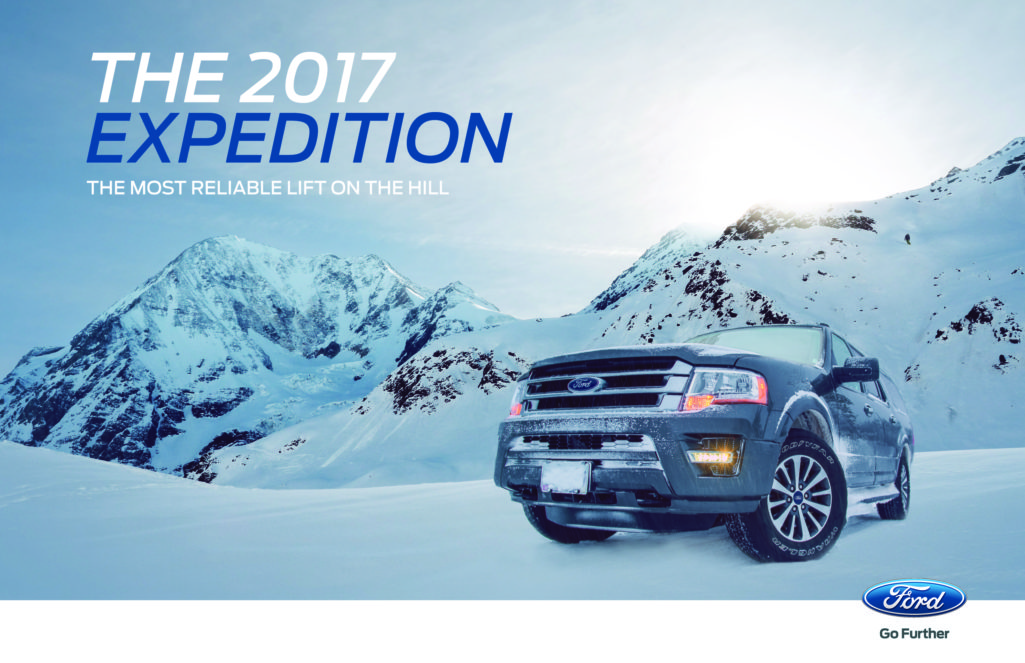
Photoshop is awesome when you have a great tagline for an advertisement in mind but no means to make a photoshoot happen!
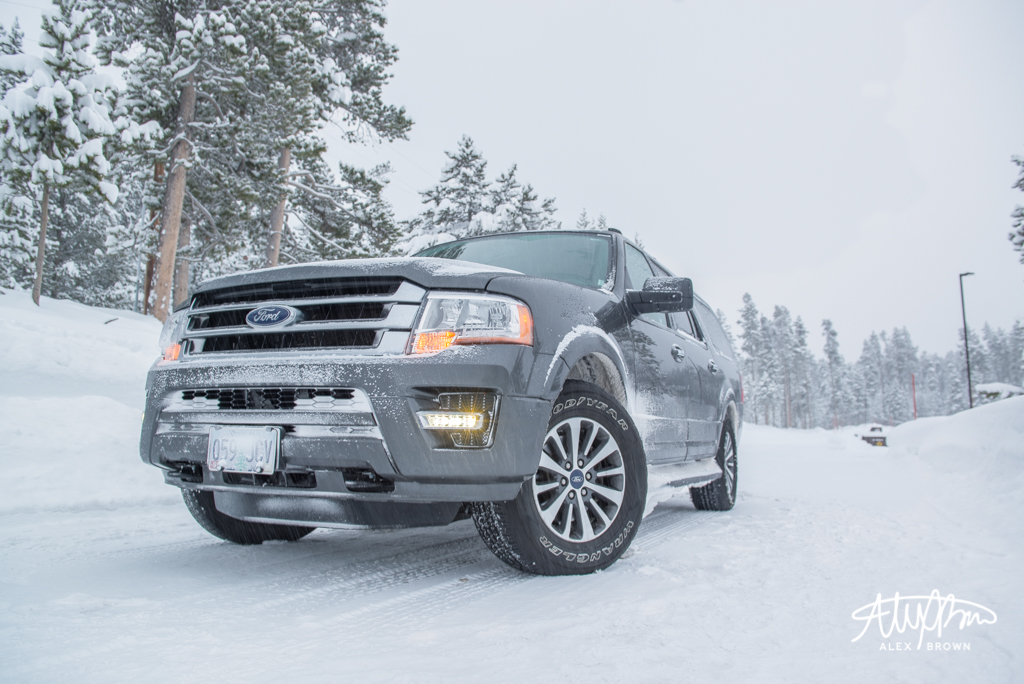
I created this photoshop composite advertising the Ford Expedition. I drove one for a day on a recent photo excursion in Grand Teton National Park. I’m a car guy so I was surprised on how well it drove!
When we stopped to use the restroom, I was just walking around and admiring the car! I decided to take out my camera and tripod and get an awesome shot of this expedition! It was in a natural environment and I thought it looked great.
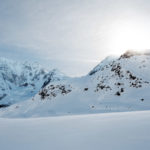
I knew I wanted to create an ad for the Expedition when I had the challenge to create a photoshop composite, so I decided to theme it around the winter months. I love remote mountain scenes, and when you put a skier or snowboarder in it, it makes it even more amazing! I had the story!
After finding the images I wanted, I brought them all together in photoshop where I blended the Expedition into this mountain scene and adjusted the coloring. To add that final touch, I put the snowboarder on the mountain and used the spot healing brush to clear the rocks out of his path (this is realistic, right?).
With the photo done, I then brought it into Illustrator where I added the text following Ford’s current advertising creative direction and dropped in that witty tagline that completes the story told by this composite!
How an ordinary day with an ordinary item turned into amazing abstract artwork.
Scanography: The process of capturing digitized images of objects for the purpose of creating printable art using a flatbed “photo” scanner with a CCD (charge-coupled device) array capturing device.
Prior to this activity, I’ve never used a scanner to create artwork. I have never even thought about using it as a method to create art. However, it’s amazing what results you can get with a scanner!
When I was thinking about what I could create with my scanner, I knew I wanted it to be abstract enough to become fine art. I have an HP Officejet 7500A, which sits on the ground in my room underneath my shelves since it’s so dang big (it can print up to 13×19). Right above the printer, I have all my cologne out on a shelf. I looked up and saw my bottle of James Bond 007 Black cologne and knew that it would be awesome with a scanner. I’ve taken some cool pictures of this bottle before, but I wanted to see how the light of the scanner would affect the texture/pattern on the bottle when it was moving.
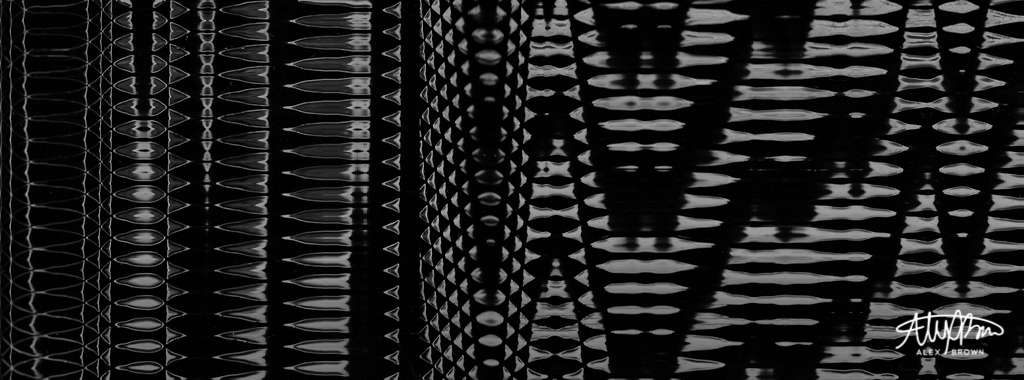
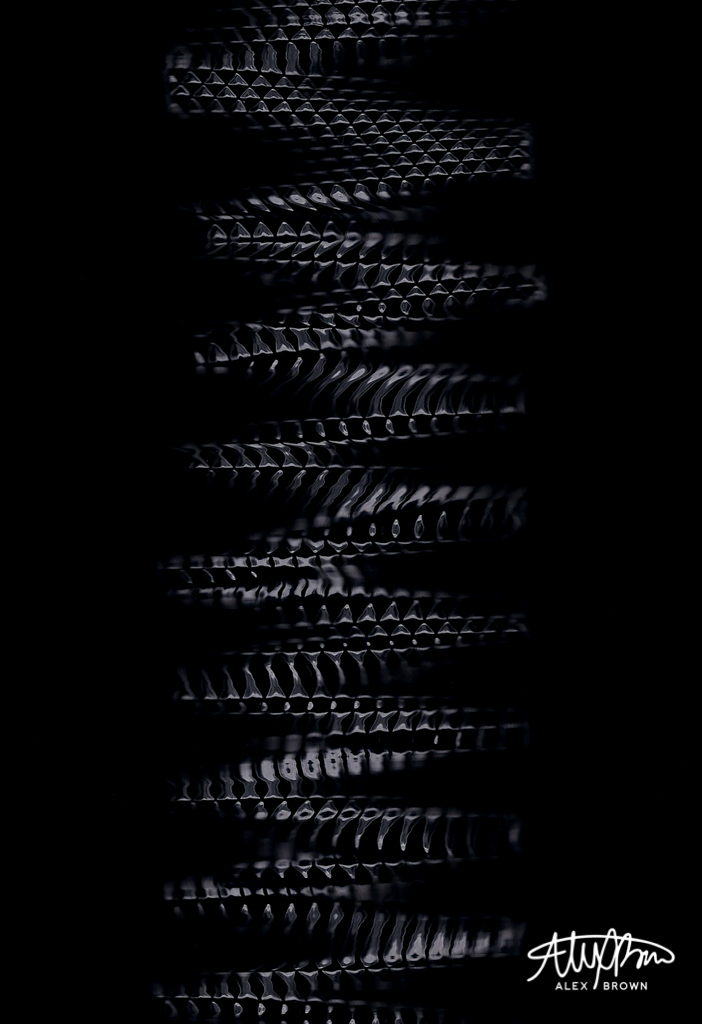
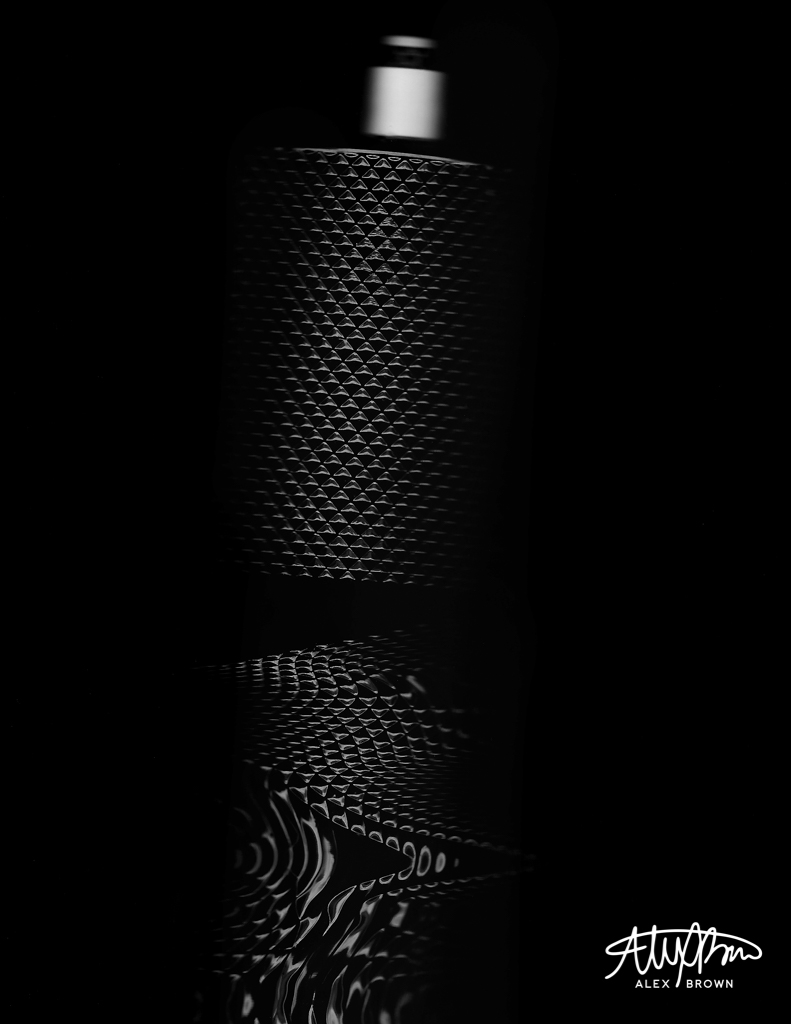
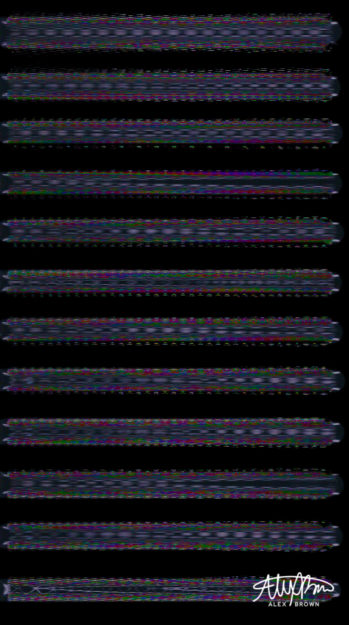
From the thirty different scans I actually committed to (I used the overview function a lot), I liked these four the best.
Graduated Texture
I love this first scan because of the graduated texture. Even though the texture of the bottle is all the same, by adjusting the speed and movement at which I moved the bottle on the bed created these variations in texture.
Snake Skin
Product Scanography
Who ever knew that you could pull of product photography with a scanner?
Science Tubes
When you play around with the scanner settings, specifically color settings it’s interesting to see what you end up with!
Hi. I'm Alex Brown a creative designer who specializes in graphic design, branding, and photography. I'm graduating from Brigham Young University in Rexburg, ID, with an Associate's degree where I focused on mastering Visual Communication and Photography, I'm continuing my education at Utah Valley University where I plan to get a BFA in Graphic Design. I am from Charlotte, NC, and I currently live in the Salt Lake area.
Get Updated
Join 4 other subscribers
To place an order call or text me at 704.954.4146 or by sending me an email at c.alexbrown@me.com Dismiss


