How a speedlight can take an ordinary portrait and turn it into an epic portrait
Recently, I went with a group of BYU-Idaho students on a photo expedition to Bannack, Montana. While at Bannack, I was able to teach them about the awesomeness of a speedlight, specifically with a large rouge flashbender. As students rotated through my station, I was able to see the formula for making an epic portrait:
Expose for the background
Shoot into the sun!
Always start at 1/1 power on your speedlight
Adjust your flash settings before you adjust your camera settings
By the end of the last rotation, I could not believe how easy it is for a photographer at any skill level to turn a portrait into an epic portrait!
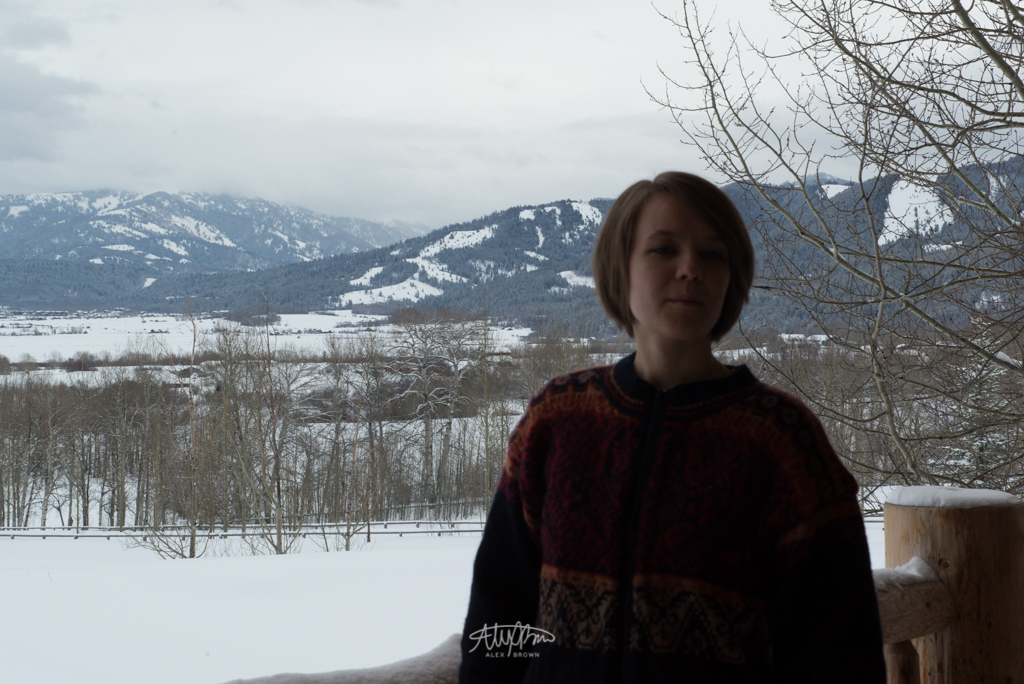
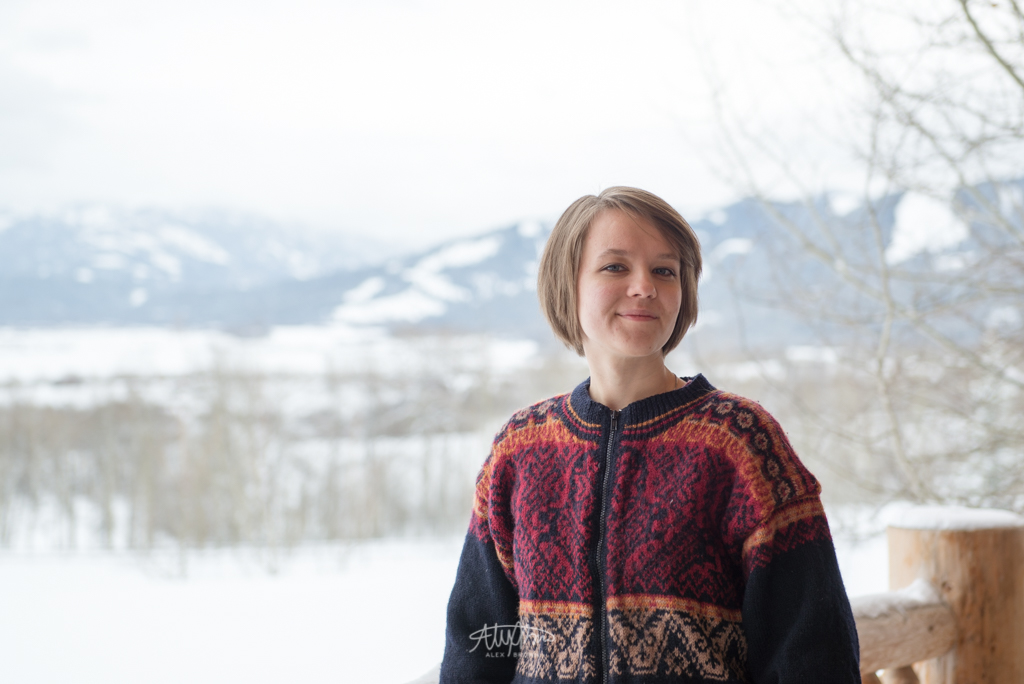
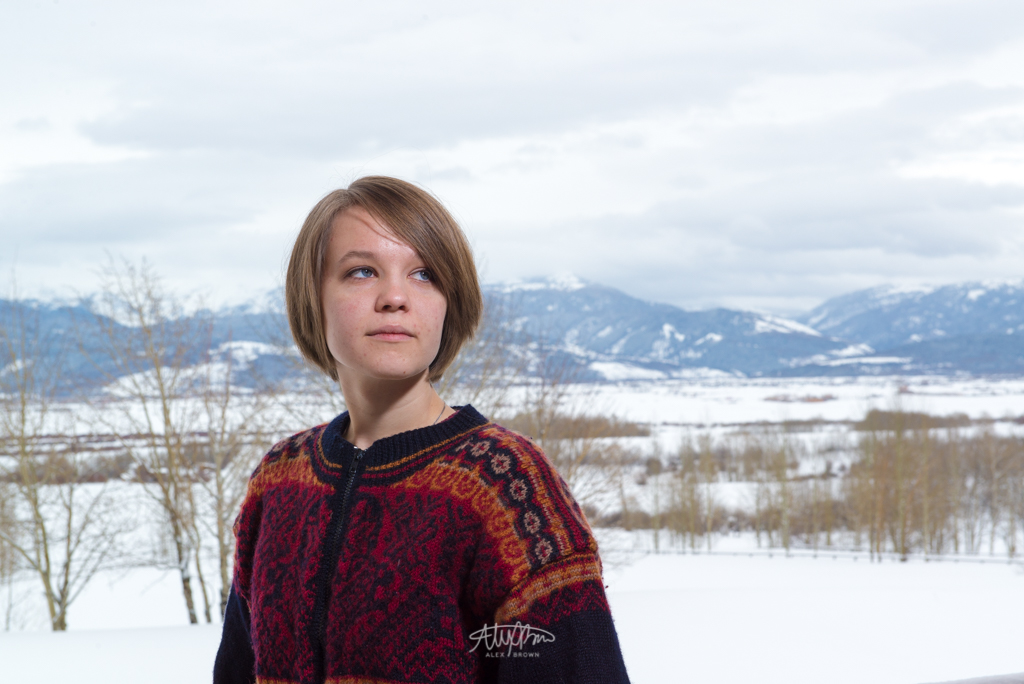
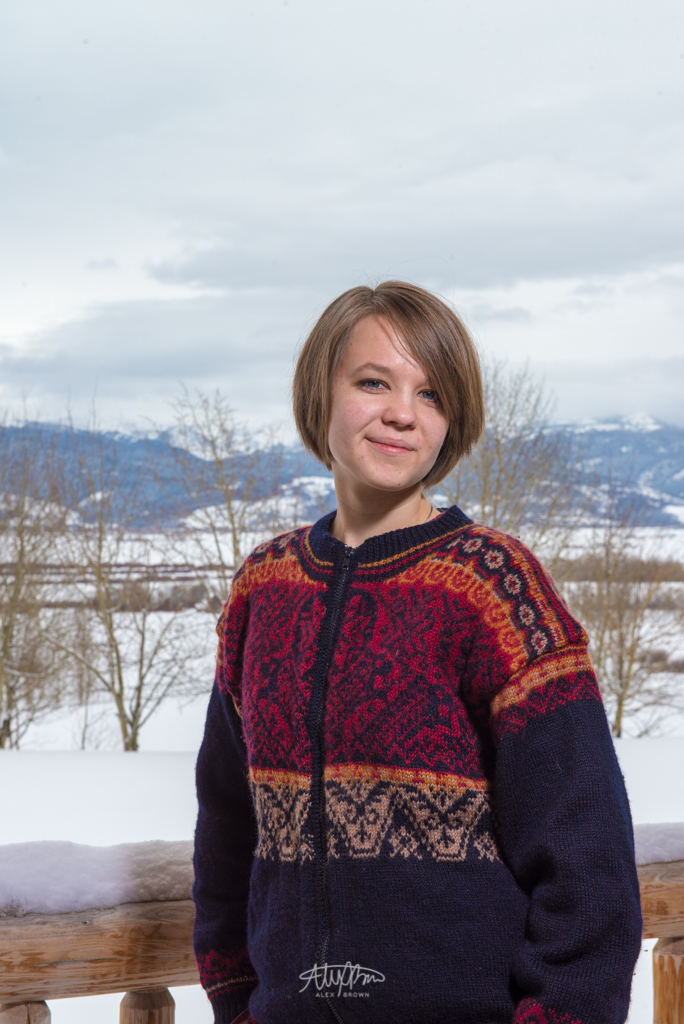
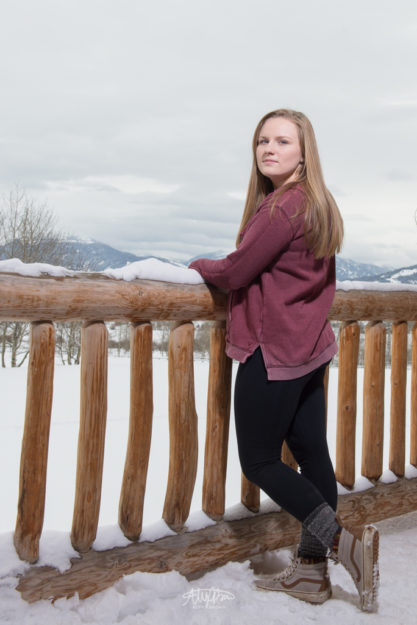
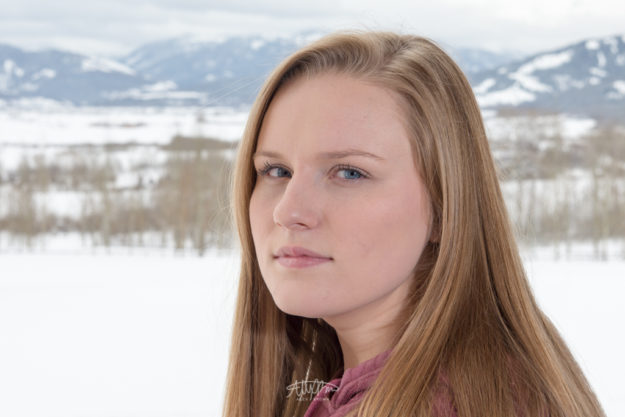
Only a few weeks prior to going to Bannack, I was able to follow these four steps in order to create some epic portraits of Jill Weaver:
Background Exposed – without Speedlight
Subject Exposed – without Speedlight
Epic Portrait – with Speedlight
Epic Portrait – with Speedlight
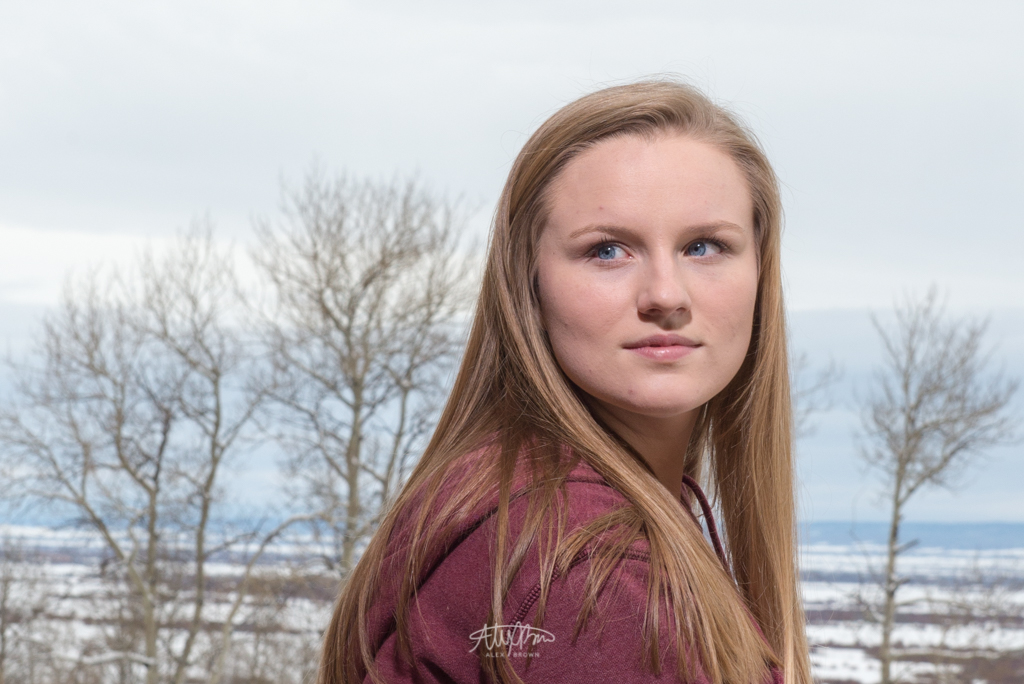
Also, take a look at more epic portraits I took of Baylie:
Epic Portrait – Baylie Madyson
Epic Portrait – Baylie Madyson
Epic Portrait – Baylie Madyson
If you want to see some more amazing epic portraits, check out photographer Sam Hurd’s Epic Portraits on Fstoppers.com
Create awesome photographs at night with light painting
One of the things that I love most about photography is showcasing the delicacy of light. Photography at night is one of the most difficult environments that a photographer can shoot in. With any long exposure photography, a tripod is a must-have.
One of the masters of light painting is Dave Black. As a sports photographer, Dave Black understands the importance of photographing movement. When you combine movement with light and long exposures, Dave Black creates stunning light painting photographs that are beyond jaw-dropping.
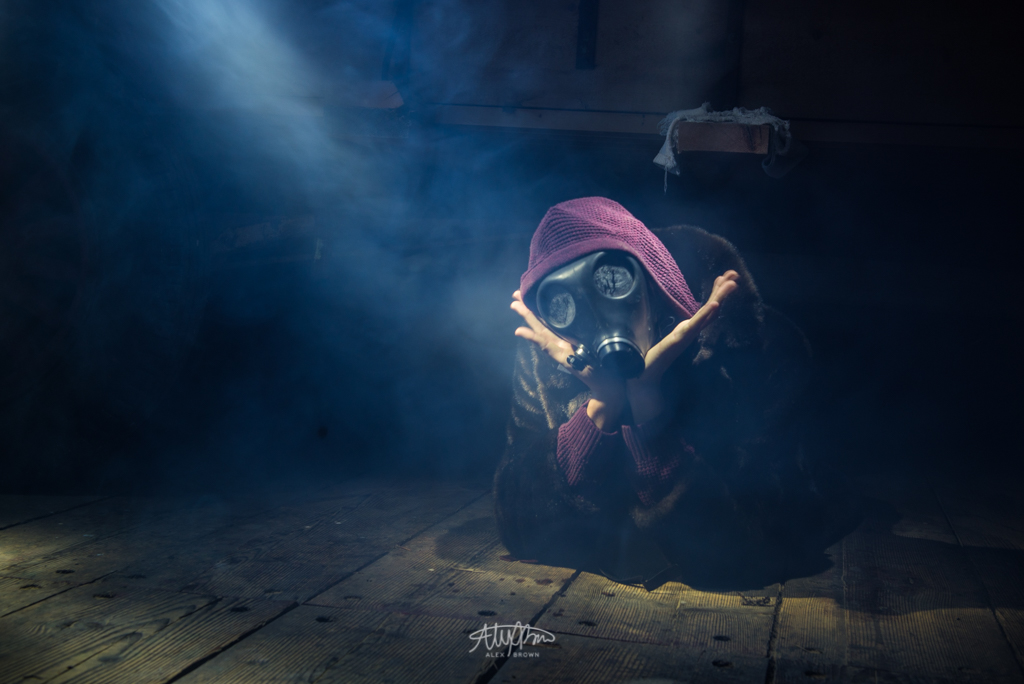
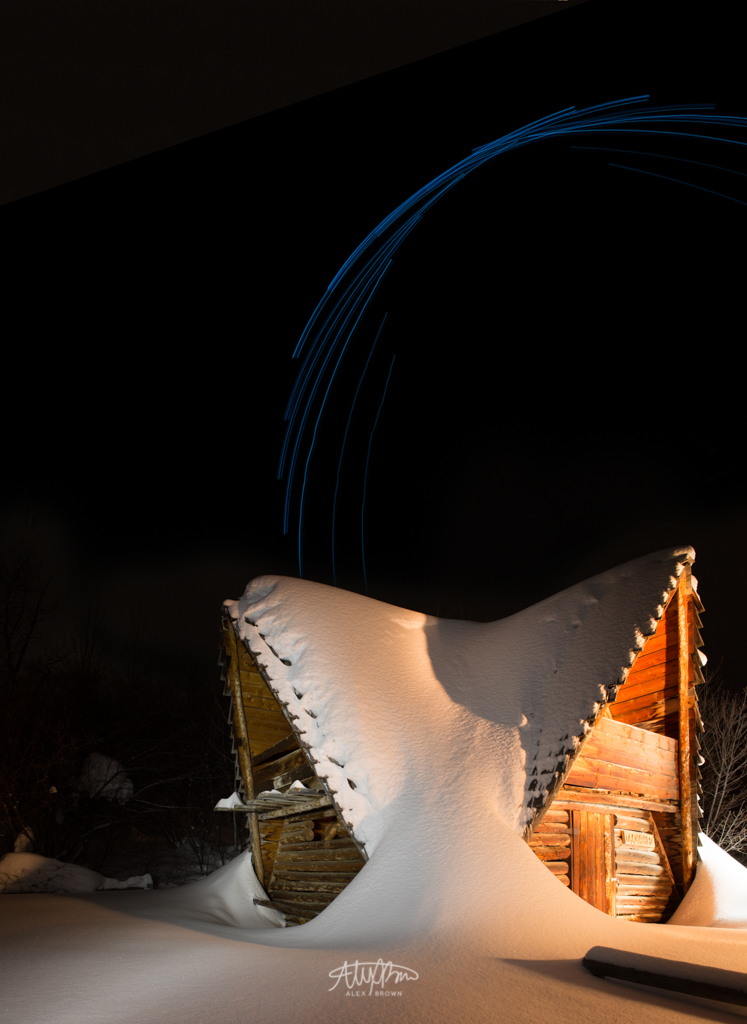
In homage to Dave Black’s light painting style, here’s an image that I took while on a photo excursion workshop in a Victor, Idaho barn. Armed with Yongnuo speedlights, 10 friends and I lined our tripods up inside this barn, turned off the lights, set our delayed shutters, and began walking around light painting the barn.
The reason I chose to show you guys this picture was because I love how it shows what light painting really is. Plus, I must admit Christine Taylor’s pose over to the left is pretty sweet as she flashes the person coming up the stairs with her awesome speedlight. (:
Light painting with people can be tricky, but if you add special effects such as fog and then top it with a creepy mask, you can get away with small movement that just adds to the photo. This was taken underneath that pioneer wagon you can see in the picture above.
Here’s another light painting of a shed on the same property. On this image, I actually placed an abstract light painting of a light orb that I took and made it look like an isolated set of star trails. Something that I want to point out about this picture is the two different color temperatures of the lights that were used to light paint this shed. The left side was light painted with an LED light while the right side of the shed was light painted with a halogen light. While most light painting is typically done with halogen lights, LED lights work just as well when it comes to light painting.
FAUX BOKEH
Bokeh, or background blur, is probably the most desired aspect when it comes to photography. By modifying the typical light painting technique, you can achieve this “faux bokeh” effect. First, you light paint the subject with your camera in focus. Then, you throw your lens out of focus using the manual focus ring and finish light painting the rest of the image. The hard part with light painting faux bokeh is to not paint over the same section in either round.
ABSTRACT
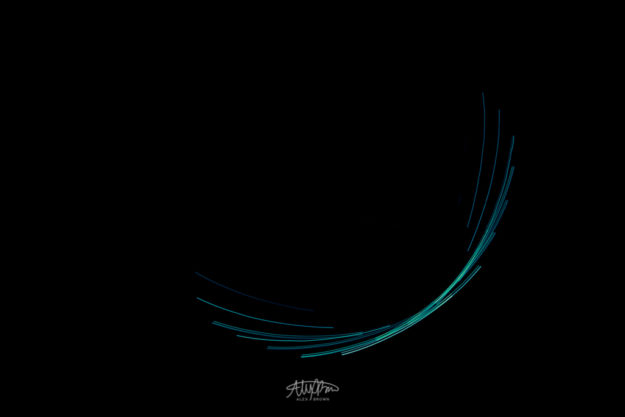
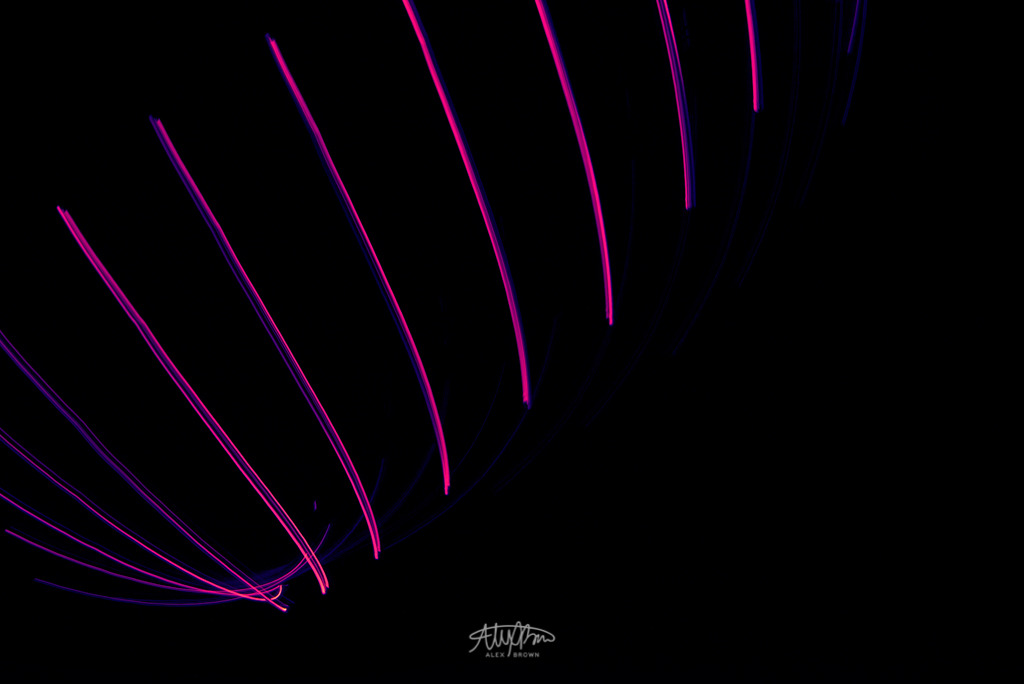
You guys should know by now how much I love abstract photography. What I love even more is when I can combine abstract photography with light painting. Photographing a light orb is super fun, yet is super challenging because you need to make sure you start your shutter at the right moment so you have a perfect overlapping light orb. Typically when photographing a light orb, you have a shutter speed of around 30 seconds. However, when photographing this light dome, I decided to get down on the ground of the barn and actually speed up my shutter speed. By speeding up my shutter, I was able to get some cool abstract shots which I then moved around in Photoshop and recolored to give a nice variation between these three.
How you can take plain old tabletop still life photography and make it extraordinary with some still life light painting.
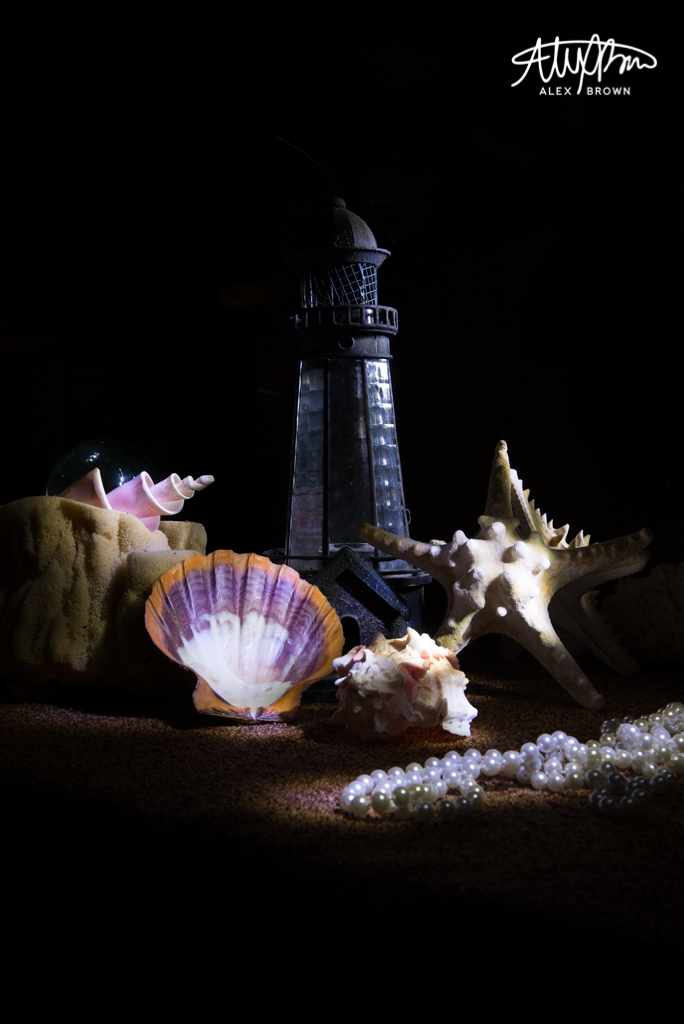
There’s something magical that happens when you have a still life setup on a tabletop and then all the lights go off. With a flashlight ready, still life photography comes to life when you add light painting.
Light painting is an advanced technique that photographers can use to add emphasis to certain subjects of an image. In order to successfully light paint, you need a tripod, a shutter speed around 15 seconds or longer and some cool subjects. It’s also mandatory that you have a completely dark room.
Still life light painting, or light painting in general, teaches you more about your camera since you have to rely on the touch and feel of your camera in the dark. Check out some more pictures by a master of still life light painting at Harold Ross’ Fine Art Photography website.
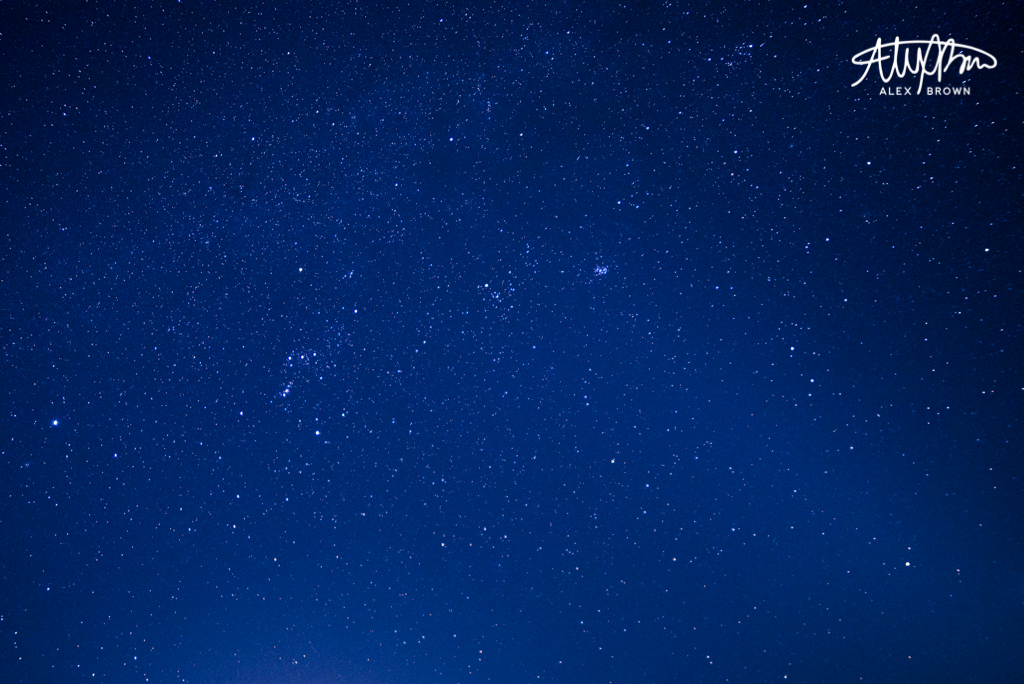
How to photograph the night sky and get amazing long exposure star pictures – even if it’s cloudy.
This past presidents day weekend, I was able to rent two lenses for my Nikon Full-Frame D600. I have already used Nikon’s 70-200mm f/2.8 lens before, but I was most excited to try out Rokinon’s Ultra Wide Angle 14mm f/2.8. Rexburg, Idaho is located one hour west of the Teton Mountain range so our weather is beyond bipolar, it’s straight up strange, which isn’t the best for photographing the stars with night sky photography.
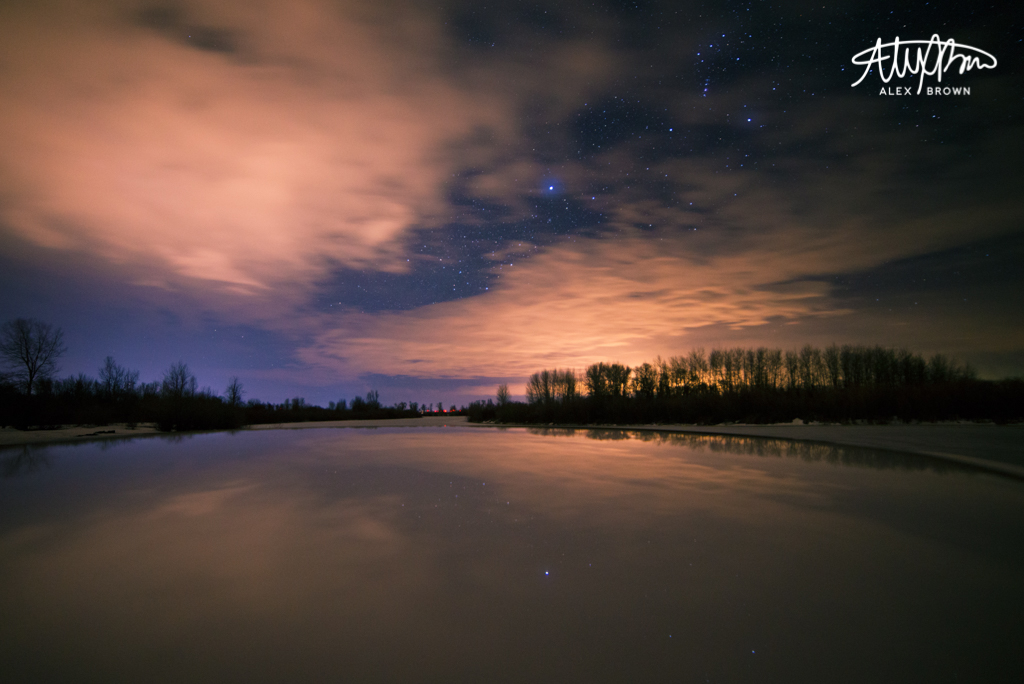
Most people would think that in order to get an awesome night sky photograph, the weather conditions have to be clear. Based upon your personal style, this might be true, but when it comes to night sky photography, I love being able to see the wispiness of the clouds – a natural bi-product of long exposure and night sky photography. However, what I didn’t know was if the clouds are thin enough, you can see through and get stars, like this beautiful night sky photography below!
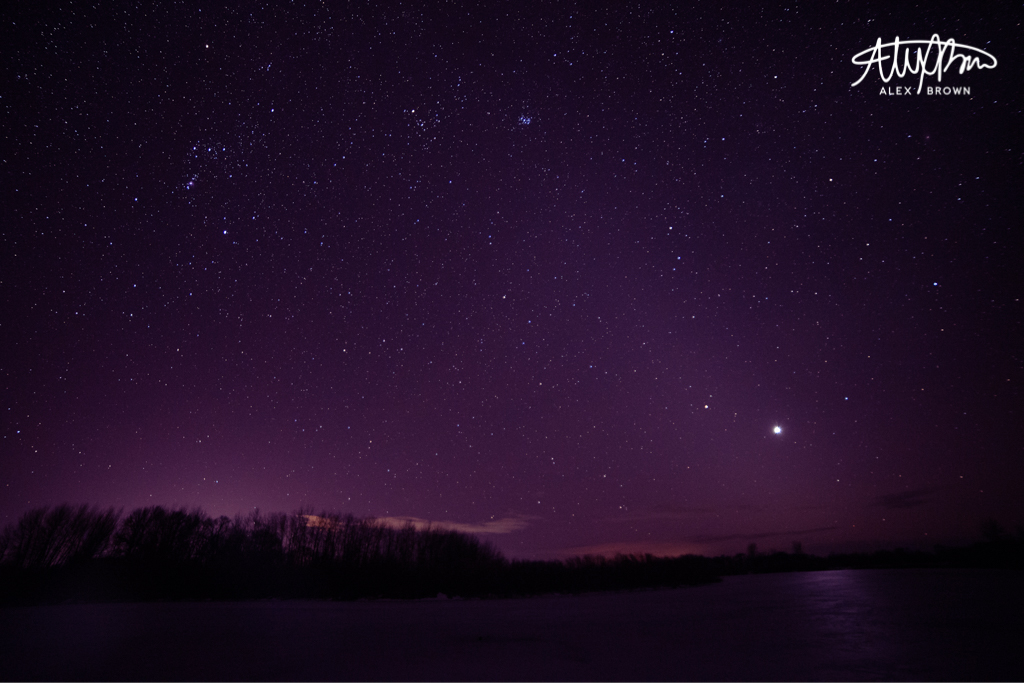
LESSON 1: BALANCING THE LIGHT
Key Tip: If you take a night sky photograph and it’s too bright, always start by dropping down your ISO as you will end up with a less noisy image. If it’s still too bright, decrease your aperture (choose a higher f/number). Also, if the moon is out start with ISO 100.
I took this night sky photo about 5-8 miles outside of Rexburg city limits in a local park at around 10:30pm… so not sunset! I love this photo because it showcases one of the most important aspects when it comes to night sky photography: light pollution. Light pollution is the worst enemy to night sky photography (besides thick cloud decks and the moon).
When your camera shutter is open for a lengthy period (15 seconds in this instance), it has all that time to collect the information, light, and create the pixels for the photograph. When combined with a wide aperture (low f/number) and a high ISO, night sky photography often becomes white sky photography, because it’s not only collecting the natural light from the city or the pollutant’s area, you’ve told the camera to add in more light while being more sensitive to light!
The settings for this night sky photograph were ISO 2000, 15 seconds @ f/3.2, 14mm. When I took this picture, I couldn’t figure out where this light source was coming from, but I did know that it was just too bright for my settings, so I adjusted accordingly.
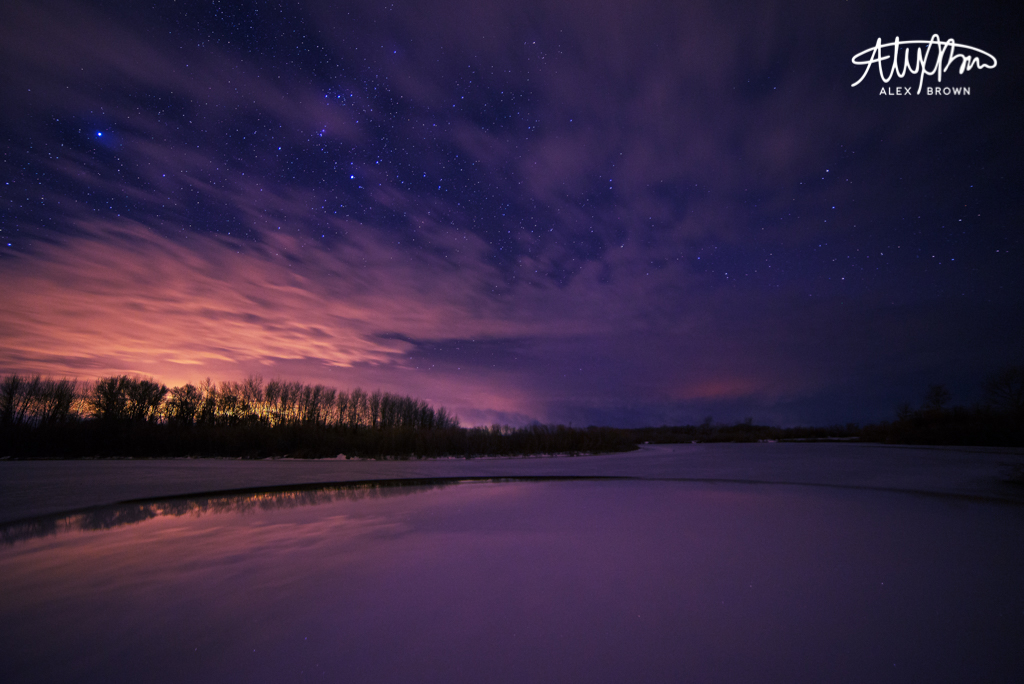
Key Tip: Use curves in Photoshop or Lightroom to adjust your night sky photograph, bringing out different colors. Go a step further by masking out only certain aspects of the image.
I think the image above is a pretty spectacular night sky photograph on its own. But what if it went on a date and married Photoshop and Lightroom? Well, let’s say that they make good-looking kids.
The first image I showed you was edited “naturally”. This is a term that I personally coined when it comes to night sky photography and basically it means that any edits made – specifically with color – are not as powerful and are more realistic to what the scene was really like. But, it doesn’t hurt to go a step beyond either.
When editing night sky photography, it’s best to use the curves panel and adjustment masks to get color where you want it and when you want it on your image. But don’t just use the RGB curves… use the individual Red, Green and Blue Channel curves when editing night sky photography. Why? It gives you more control over your color and when combined with masks you are able to hide and reveal certain areas of the image. On this picture above, I actually kept the color of the light-polluted clouds from the camera because the transition to the purple hues was less harsh.
LESSON 3: FOCUS ISN’T FREE, IT’S FOUND
Key Tip: It’s okay if you forget to focus ahead of time… just know that it’ll take a bit longer to get a good focus on the night sky. Also, you don’t always have to use a tripod… look for other objects that you can set your camera on that would create and add interest.
With night sky photography, you don’t necessarily have to use a tripod. For the first two images on this post, I set my tripod on top of my white car. By doing this it gave it a nice surface to reflect off of and it almost looks like it’s a thawing lake. Sorry if I had you fooled.
Having sharp and clear stars is the primary goal of any night sky photographer. While there are different methods on how to properly focus the night sky, my favorite is trial and error. While each camera and lens is different, the best thing is to start with infinity on the focus ring, and work your way until you get nice tack-sharp stars. Once you get that, always remember that because it makes focusing easier on other star trips.
Focusing stars is kind of a two-fold system with night sky photography. The second part of this system is sharpening. Always make sure you sharpen your stars image as it will bring out the detail of even more stars — stars you thought weren’t even in the night sky! But remember… no amount of post-production sharpening can make a blurry image sharp! If you’re a photographer and you’ve never taken a blurry image, I’d love to meet you and learn your secret!
DON’T STOP THE SHUTTER YET…
Here are my other three top picks when it comes to Night Star Photography
I love product photography. It’s amazing what cool angles you are able to get and how interesting your shots can become by changing up lighting. What’s even cooler is when you take your product outdoors!
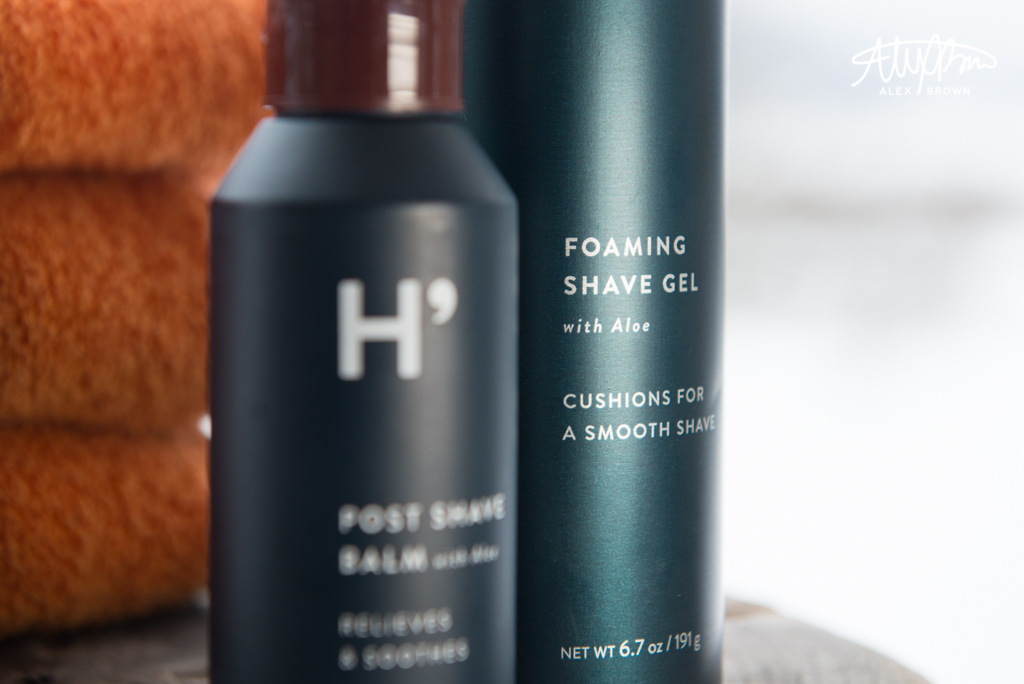
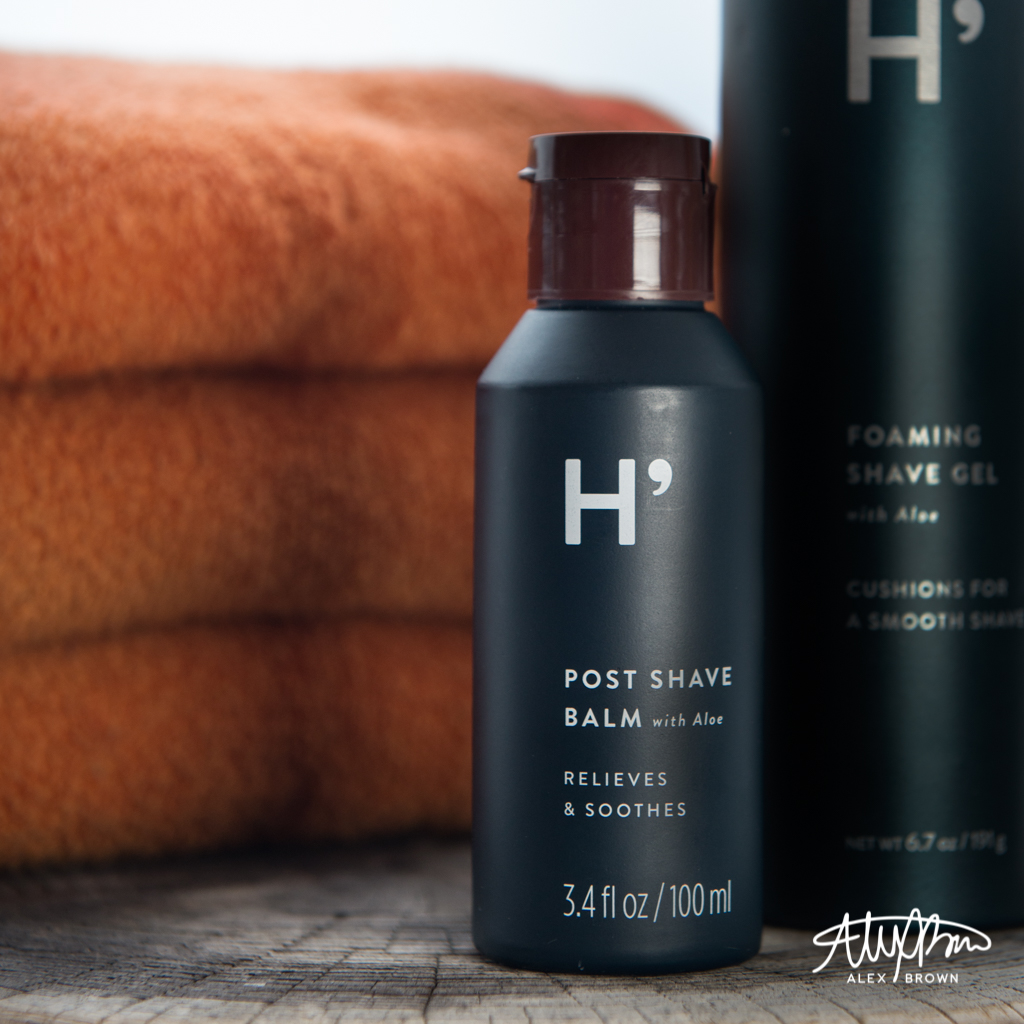
Harry’s is a really company that in the past year or two has taken off, revolutionizing the shaving world. But why should such a revolutionary product be taken on a plain white background? I set off to change that. While on my photo excursion, I took the family of Harry’s products and set them up on the back porch. I loved the way that this wood contrasted against the white box of the razor in addition to the dark teal bottles.
The Family Shot
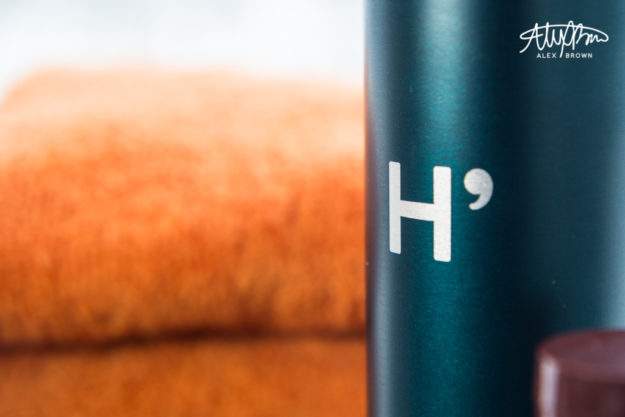
Following standard design principles help improve photography! I chose to stylize this shoot with orange hand towels, which complement the steel teal of Harry’s brand.
The texture of the deck is beautiful against this modern steel teal colored bottle contrasted with the orange towels.
With this picture, you get a small glimpse of the background – a snow covered land.
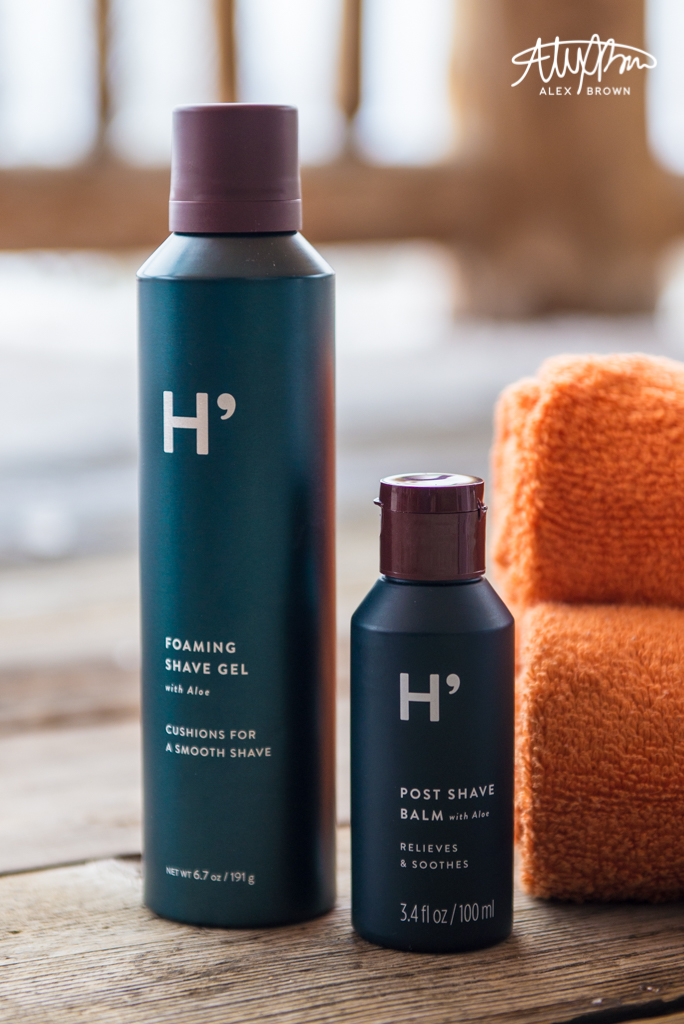
I love using Depth of field in product photography. This is one of my favorite shots because it’s perfect for Harry’s target market which is the social media savvy man (or woman). The depth of field combined with the lighting in this picture allows the customer to be able to read that they also have foaming shave gel.
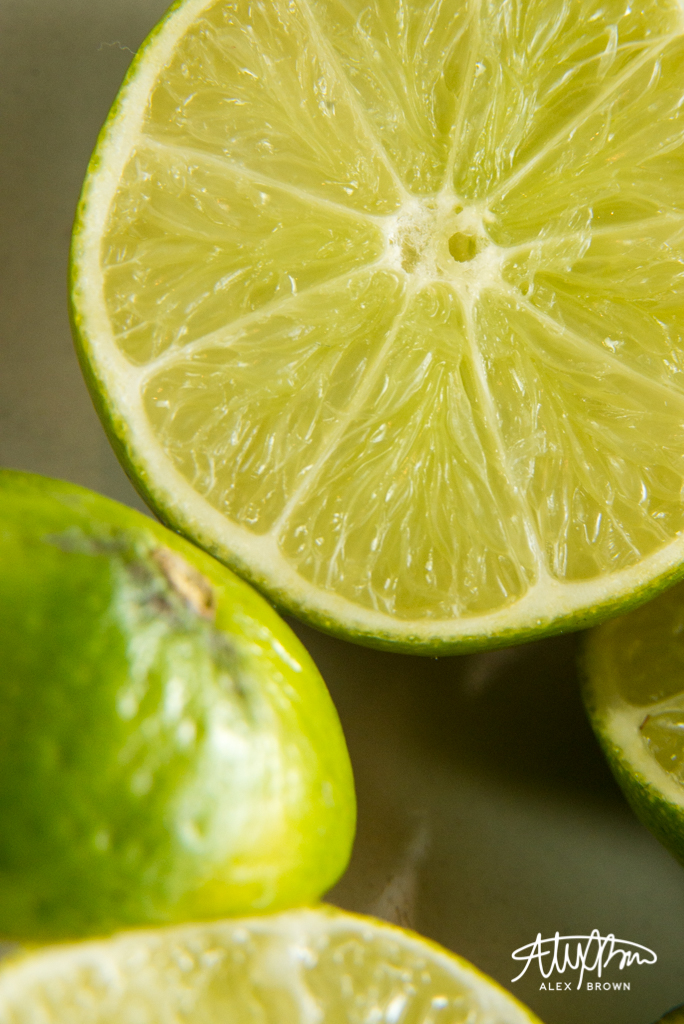
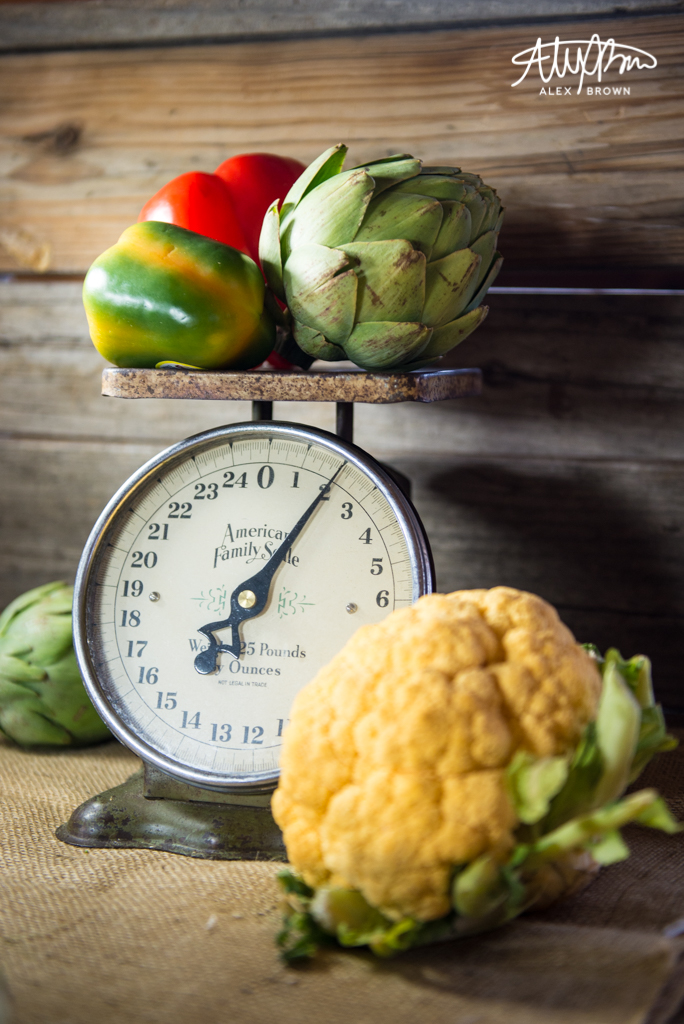
If you can’t tell by now, I’m a person who loves color. So being able to photograph fresh fruit and produce was exciting for me because color is KEY! Like any form of food photography, the main purpose is to make the food your photographing look appealing and appetizing. With fresh fruit and produce photography, you’re on a race against time!
While on my photo excursion/worskhops in Jackson Hole, I discovered three things that are the most important when it comes to fresh fruits and produce photography:
You’re never close enough… GET CLOSER!
Texture, Texture, Texture
Cut, Chop, Dice, Open, Eat!
You’re never close enough
This small dish of limes was sitting by the window off to the side at one of our stations in our workshop. I personally am a fan of this color, so it immediately grabbed my attention. By getting up close and personal, you are able to see details that you might not have otherwise noticed. When you think you’re close enough, get closer! I went a step further and took this picture with macro tubes which showcases the beautiful delicate texture of the limes! You can almost see the squishiness of all that lime juice!
Macro Limes
Texture, Texture, Texture
Food is full of textures, so why not repeat and parallel that? I love this shot because of all the texture that is in this photograph. From the burlap cloth on the bottom, to the cauliflower’s bumpy and rough texture, to the artichoke contrasted against the peppers, all these textures come together to create some amazing contrast in this picture, that help accentuate the different details in each fruit and produce item.
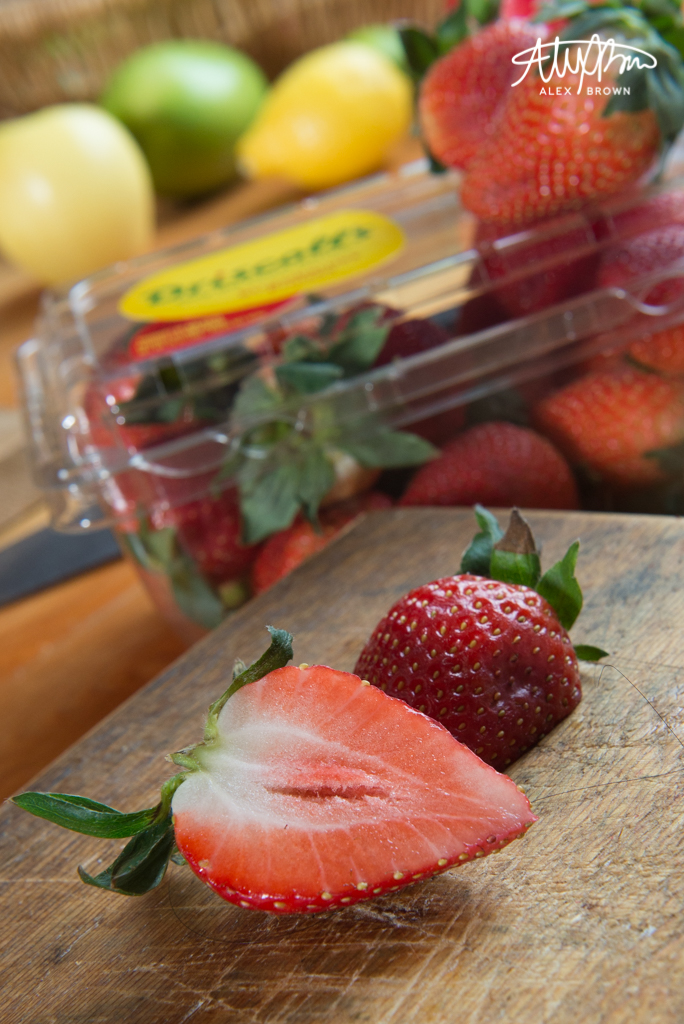
Dicing and Slicing with Depth of Field
Cut, Slice and Dice your fresh fruit and produce to expose the beautiful inside. These strawberries were sliced in half and it opened up a whole new texture, which looks awesome when contrasted against the outside of the strawberry. This is perhaps my favorite picture because of the depth of field and the atmospheric perspective that it has (we can apply this to food and produce photography, right?). The repetition of colors – red, green, yellow – at each level/depth help create a powerful visual story!
Check out Kelsea Cherie’s website for some other amazing pictures of fresh produce photography!
Hi. I'm Alex Brown a creative designer who specializes in graphic design, branding, and photography. I'm graduating from Brigham Young University in Rexburg, ID, with an Associate's degree where I focused on mastering Visual Communication and Photography, I'm continuing my education at Utah Valley University where I plan to get a BFA in Graphic Design. I am from Charlotte, NC, and I currently live in the Salt Lake area.
Get Updated
Join 4 other subscribers
To place an order call or text me at 704.954.4146 or by sending me an email at c.alexbrown@me.com Dismiss


