by Alex Brown | Mar 4, 2017
How a speedlight can take an ordinary portrait and turn it into an epic portrait
Recently, I went with a group of BYU-Idaho students on a photo expedition to Bannack, Montana. While at Bannack, I was able to teach them about the awesomeness of a speedlight, specifically with a large rouge flashbender. As students rotated through my station, I was able to see the formula for making an epic portrait:
- Expose for the background
- Shoot into the sun!
- Always start at 1/1 power on your speedlight
- Adjust your flash settings before you adjust your camera settings
By the end of the last rotation, I could not believe how easy it is for a photographer at any skill level to turn a portrait into an epic portrait!
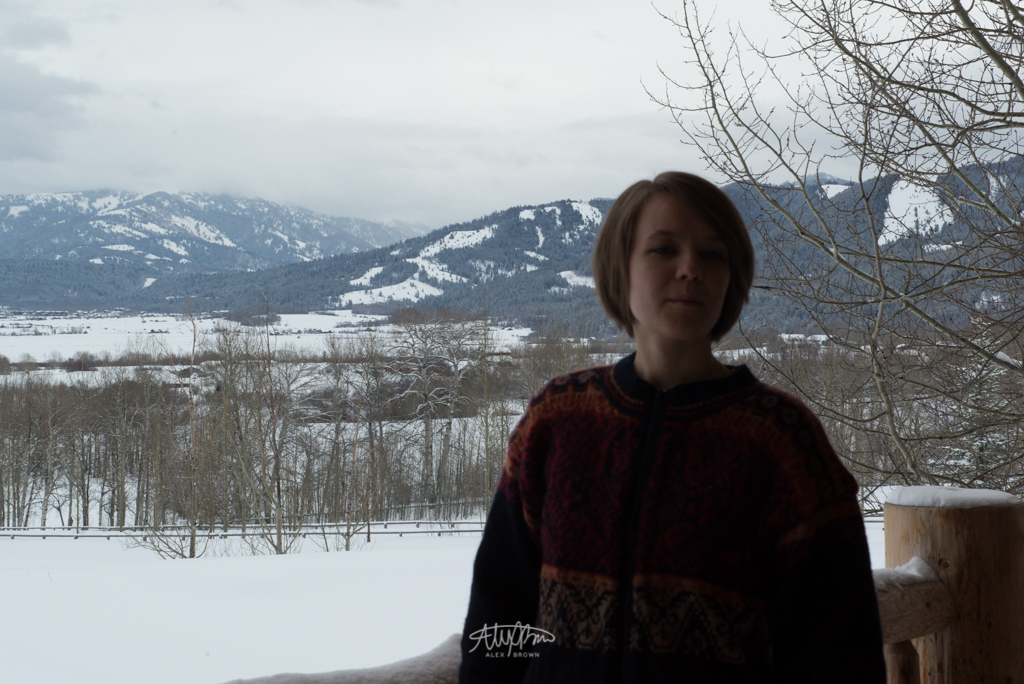
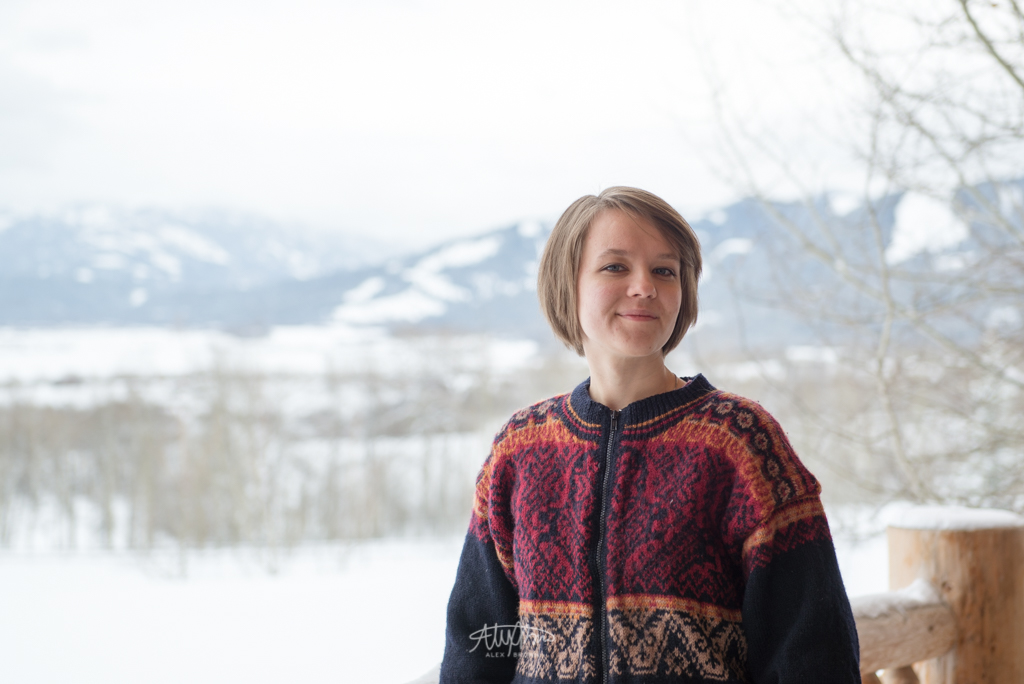
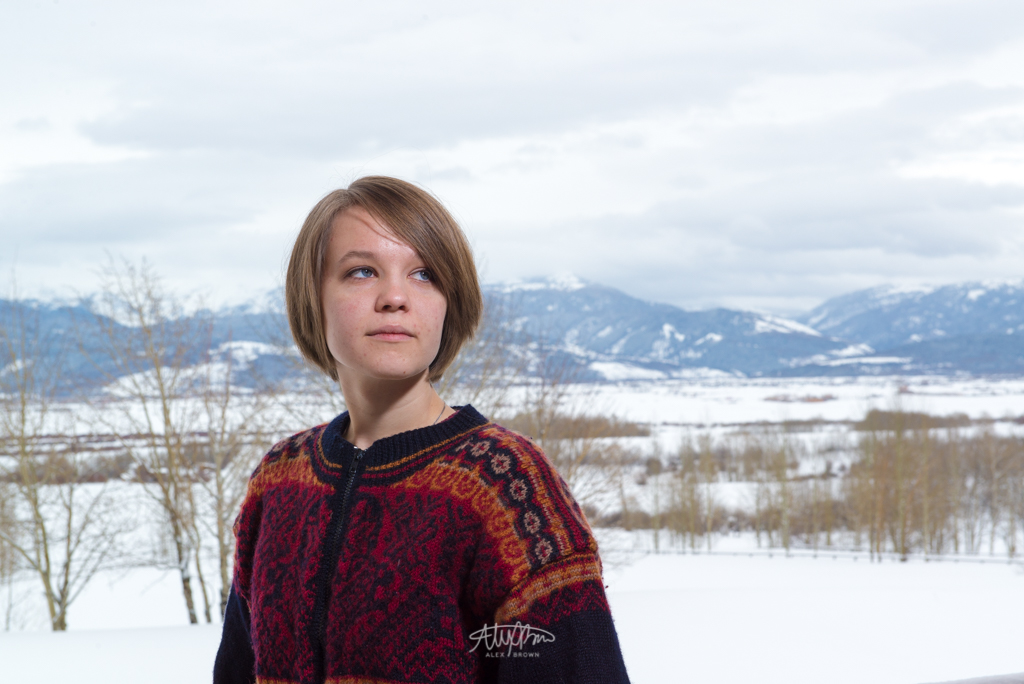
Only a few weeks prior to going to Bannack, I was able to follow these four steps in order to create some epic portraits of Jill Weaver:
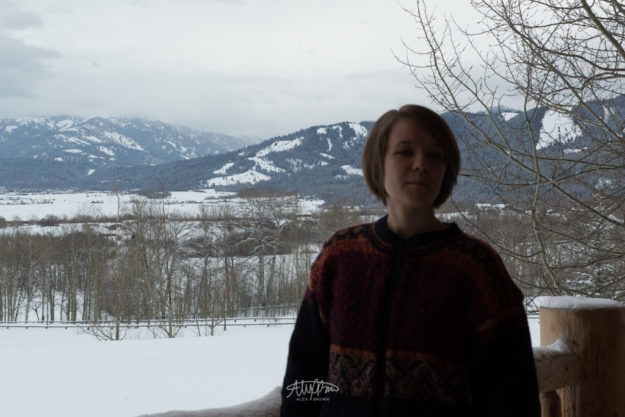
Background Exposed – without Speedlight

Subject Exposed – without Speedlight

Epic Portrait – with Speedlight
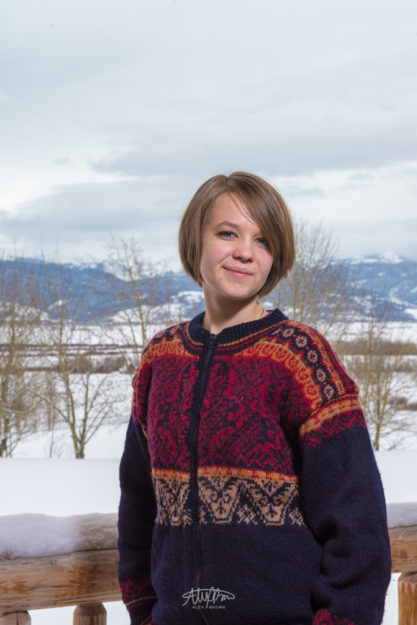
Epic Portrait – with Speedlight
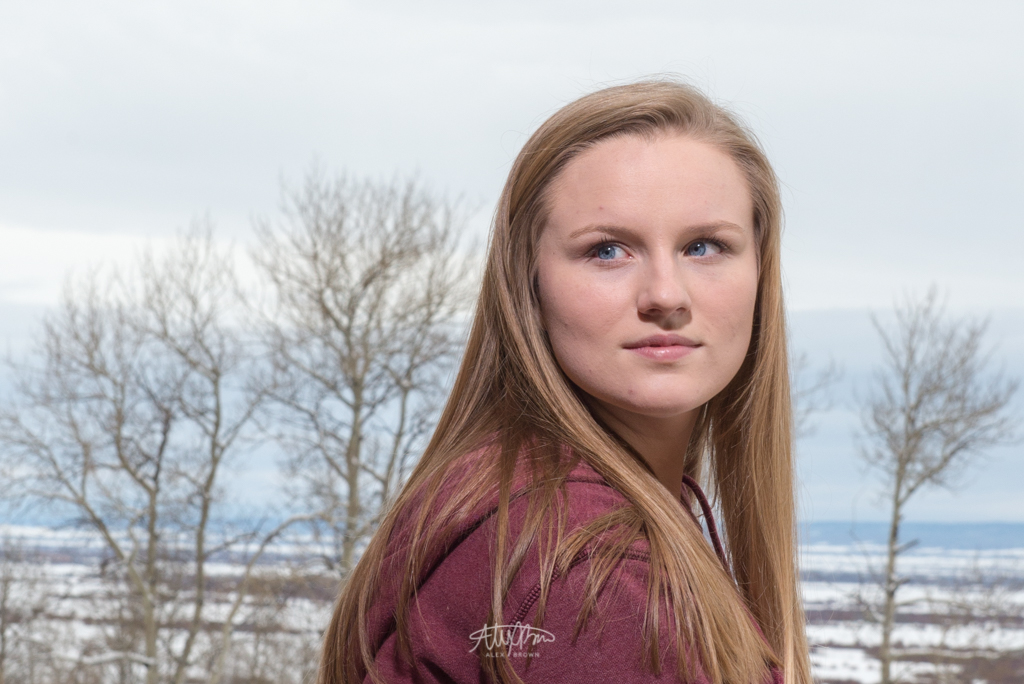
Also, take a look at more epic portraits I took of Baylie:
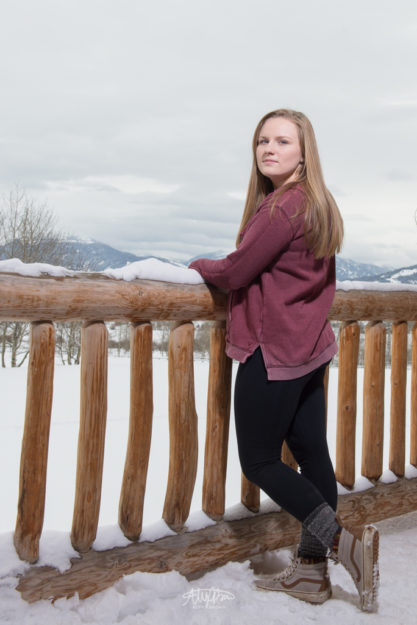
Epic Portrait – Baylie Madyson
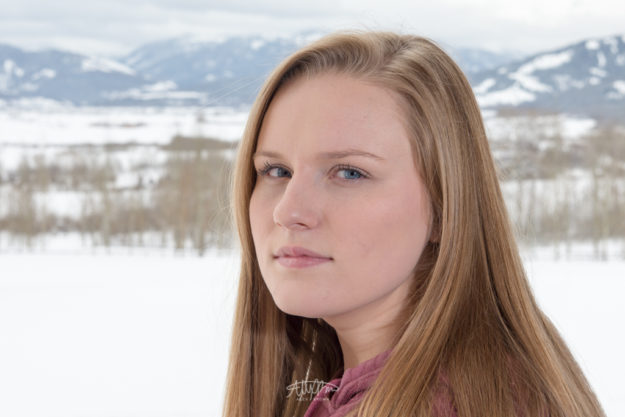
Epic Portrait – Baylie Madyson

Epic Portrait – Baylie Madyson
If you want to see some more amazing epic portraits, check out photographer Sam Hurd’s Epic Portraits on Fstoppers.com
by Alex Brown | Mar 4, 2017
A quick and easy solution for any photographer to have studio quality lighting on the go.
One of the most important aspects of photography is lighting. Lighting is key to a picture because it helps in creating dimension and emotion. Even without lighting, photographers can achieve and take amazing pictures.
On my recent photography workshop in Victor, Idaho, we learned a technique that allows any photographer to get studio quality lighting on the go. Whether your a product or portrait photographer, this lighting technique is perfect for any mobile photographer.
Speedlights have become one of my main go to items in my photography bag. The power that you get from a speedlight is unmatched when you compare and consider the portability factor.
Speedlights are great for a mobile photographer because they can be mounted on stands, tripods, or even be hand held. Typically whenever I like to shoot, I prefer to have a lighting assistant as I am able to get better lighting from different, obscure angles.
However, having a lighting assistant isn’t always possible. Plus, I’m not a big fan of having a speedlight mounted on a fixed stand. When I shoot with a speedlight, I love to be able to change the position between each shot, and a stand makes it hard for me to do that when I’m alone.
If you’re a mobile photographer, always on the go, there’s an easy solution for you. My friend, mentor, and professor, Caryn Esplin taught us the magic of MTS: Mobile Triangle Snoot.
It’s important to mention that MTS is not meant to have a black background. MTS is meant to have shadows and highlights that allow the subject to be exposed while the background is tastefully exposed. Here’s an example of a product shot that I was able to capture utilizing the MTS method.
The best thing about MTS is it looks like you’re not even using an off camera flash. In this case, the reflection you can see on the front of the bottle is from the windows – not from the snooted speedlight. By shooting the speedlight we direct the light in combination with its power setting.
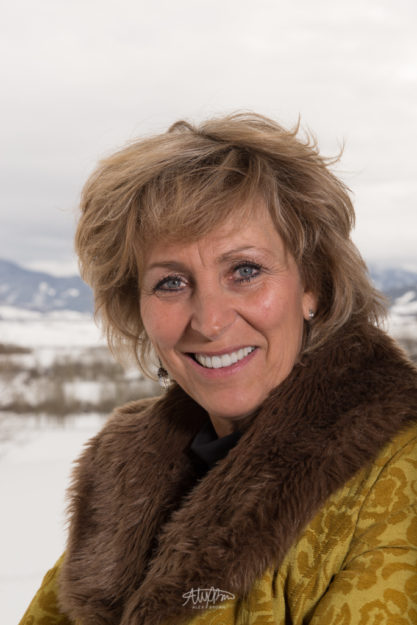
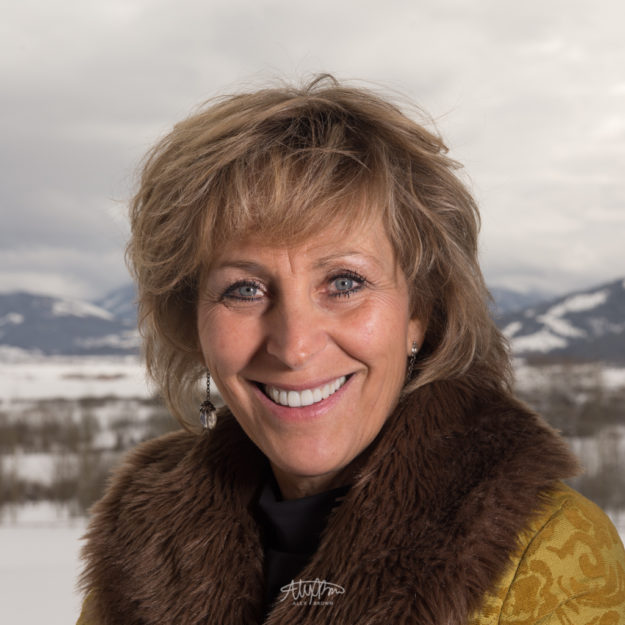
To wrap this post up, take a look at these two portraits I took of Caryn Esplin herself. The thing I absolutely love about the MTS technique is that it looks like I didn’t even use a speedlight, however, you can tell because of the great round catchlight in her eye!
For more lighting techniques for the mobile photographer, take a look at Brian Hirschy’s blog post: Mobile Lighting for Travel Photography.
by Alex Brown | Feb 11, 2017
Creating watercolors with Photoshop is fast, easy and fun!
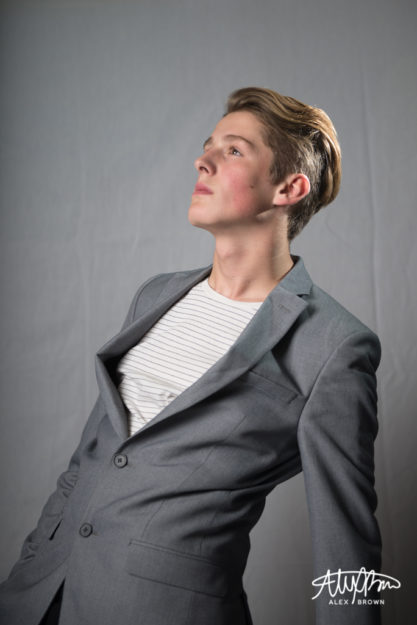
I had a lot of fun creating this watercolor piece in photoshop. I took this picture of Boston, a 15 year old model here in Rexburg, a few months ago at a shoot. When shooting this picture, I wanted to keep it simple. I love his facial expression and how he’s looking off to the left, but also his swagger in his stagger!
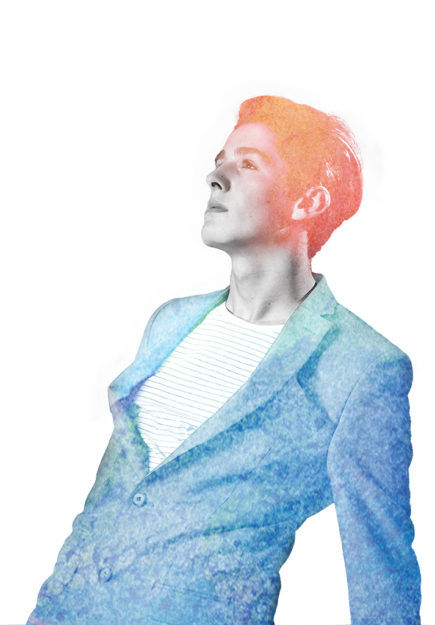
Creating watercolors in photoshop is way easier than I thought it would be. I started by following this tutorial, but eventually dropped off and started exploring on my own!
So you don’t have to watch the video, I’ll do a quick run through of what I did:
- Select and Mask the original photo so it would be against a white background
- Placed the image in a new document
- Desaturated the image 100%
- Added the Watercolor effect from the effect gallery
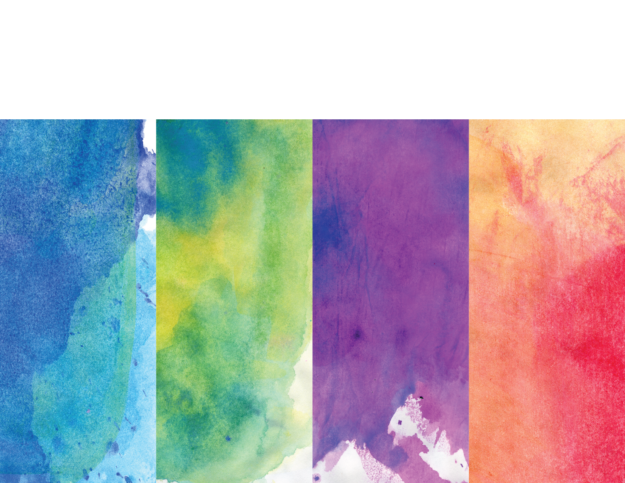
- Placed the blue watercolor image over my image with the screen blending mode
- Masked out with a brush the blue to only be on his suit
- Placed my orange and pink watercolor image on top with the lighten blending mode
- Masked out with a brush the orange to only be on his hair and then adjusted the opacity to slowly graduate off his face
I chose orange and blue since they are complementary colors and they looked awesome together! When placing the blue watercolor, I included more of the bright aqua tones at the top of his jacket because it was a much more vibrant contrast with the reds, oranges and pinks of the other watercolor in his hair!
Here is the original image of Boston that I used for this watercolor. I used the watercolor textures on a project a few years back so I can’t link to the original download anymore, but heres the file that I still do have and what I used!
by Alex Brown | Jan 14, 2017
How to turn an everyday male headshot into a billboard-ready, fashion photograph using lighting patterns and high-end retouching
Headshots are often seen as and perceived as girly and glamorous: Hours of makeup followed by hours of hair, and in the end there aren’t really any shots that she loves. When it comes to photographing male headshots, simplicity is key. The goal of a photographer is to balance the light. When taking male headshots, the simple application of standard lighting patterns can make the difference between not or HOT! If you combine these lighting patterns with some post production high-end retouching, your male headshot steps it up a level, becoming billboard ready!
With any headshot, good auxiliary lighting is key. For all the male headshots below, I used an Einstein strobe with a beauty dish and a diffuser cover. By using a beauty dish, we get the beautiful circular outlined catch light in the eyes!

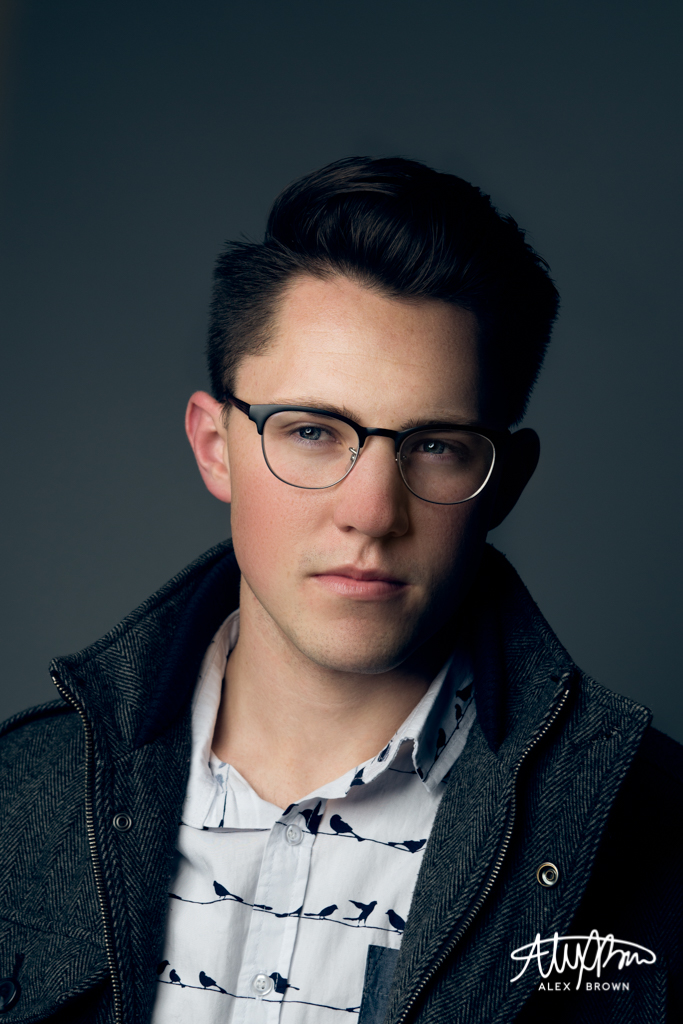
Loop Lighting
Named after the shadow loop underneath and to the side of the nose, Loop lighting is one of the most typical lighting patterns because it achieves a flattering look while at the same time creating depth. To take this photo a step above and beyond, I did some high end retouching to help even out the complexion and shadows on the skin, creating even better contrast with the glasses. Eyewear photographers, watch out! For more examples of high end retouching check out my buddy Gerardo Sumano, who is an expert at high end fashion photography and retouching!

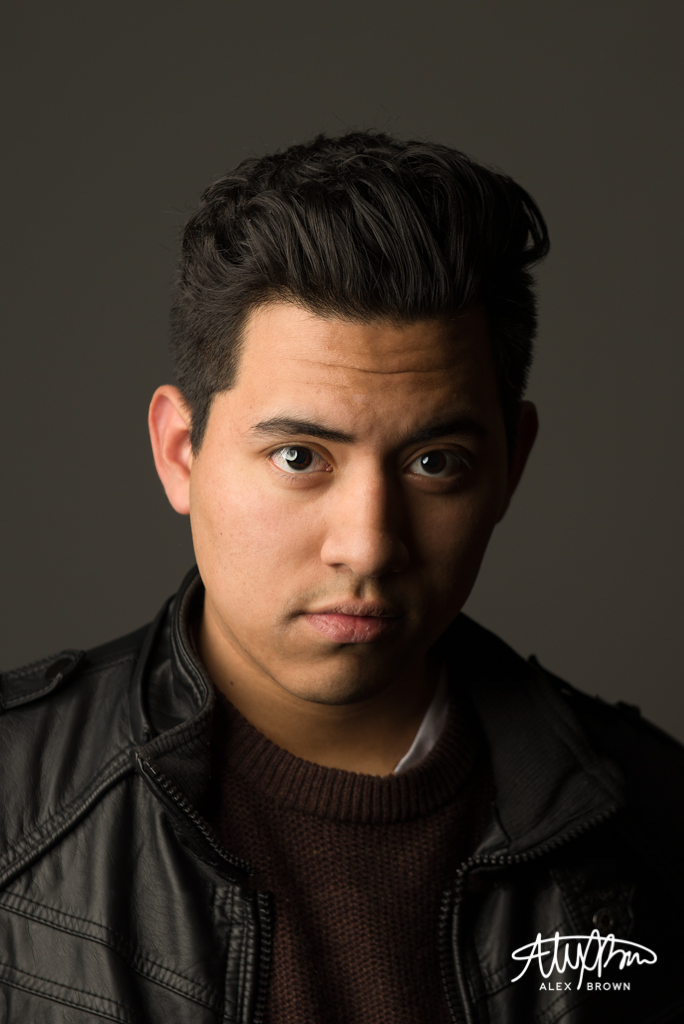
Rembrandt Lighting
Rembrandt lighting is lighting that features a triangle underneath the eye on the short side of the light.

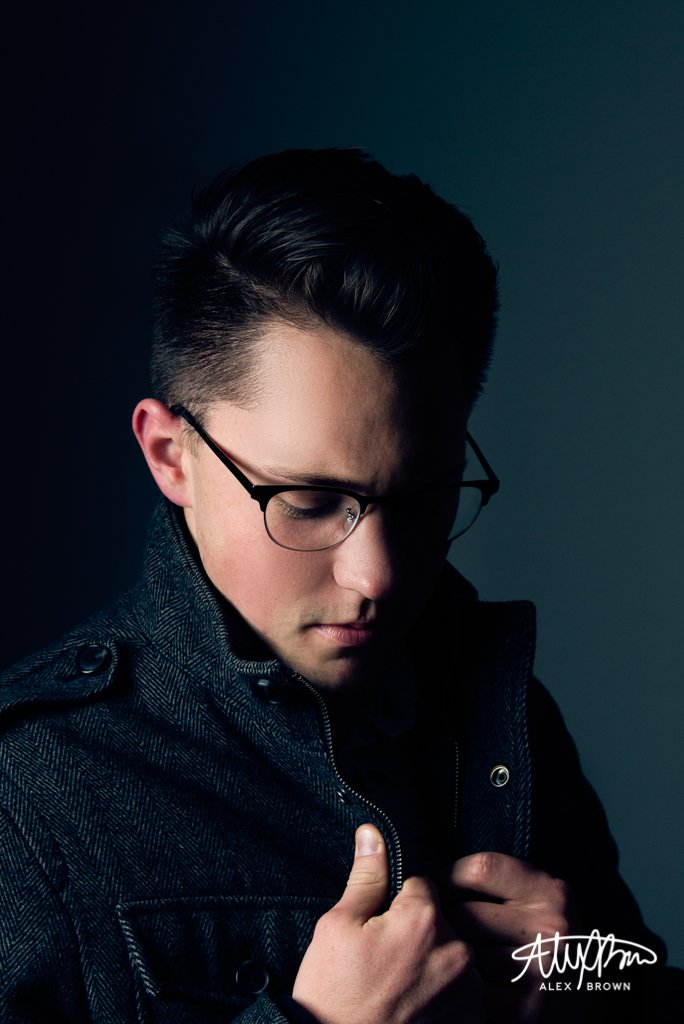
Split Lighting
Split lighting is where one side of the face is lit while the other is dark.